

How to use the facebook pixel?
![]()
The Facebook pixel is a key tool in the marketing of an online shop. Learn how to use it with this tutorial.
What is the purpose of the pixel?
The Facebook pixel allows you to measure, optimise and create audiences for your advertising campaigns via Facebook. You will be able to better understand your customers’ behaviour and track your conversions to optimise your Facebook campaigns.
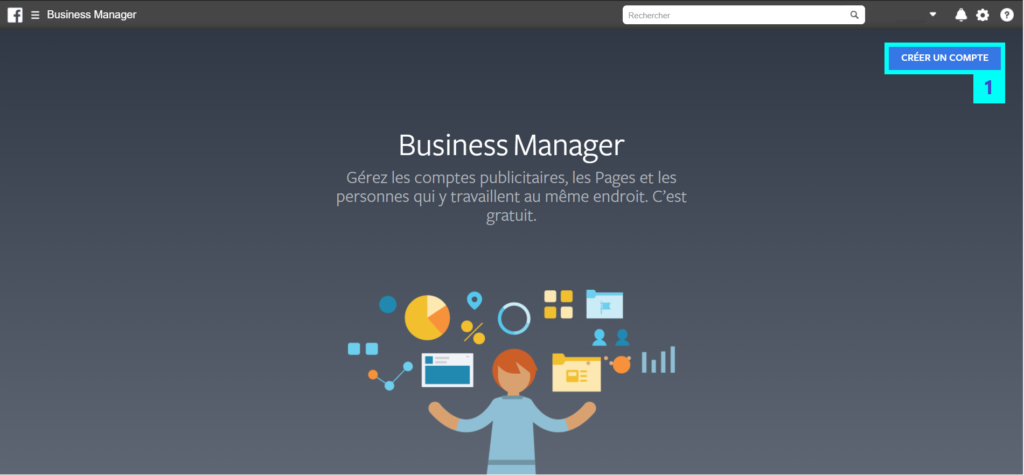
1. Create an account
Go to business.facebook.com/overview and click Create Account (1).
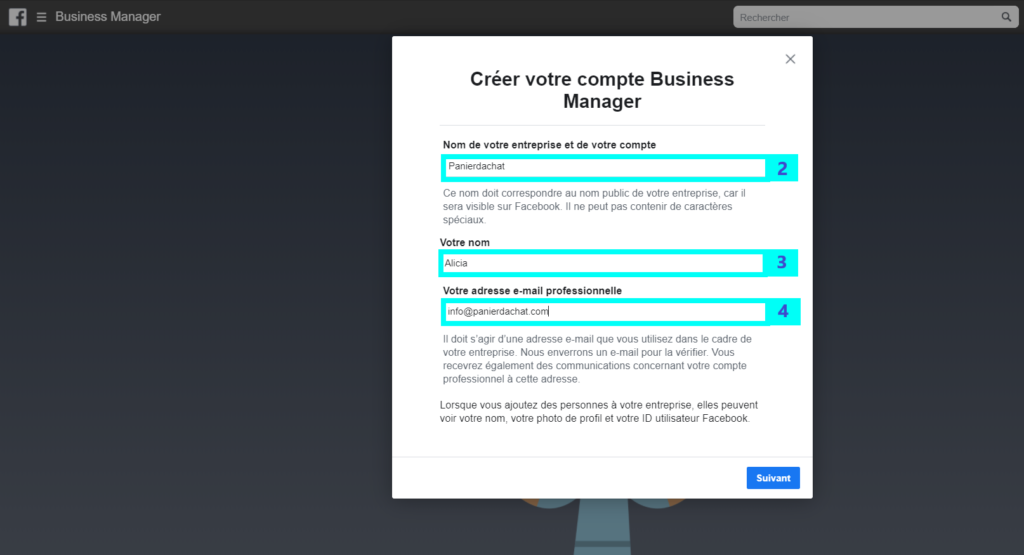
Enter the company name (2), fill in your name (3) and business email address (4), and click Next.
2. Create a Facebook pixel
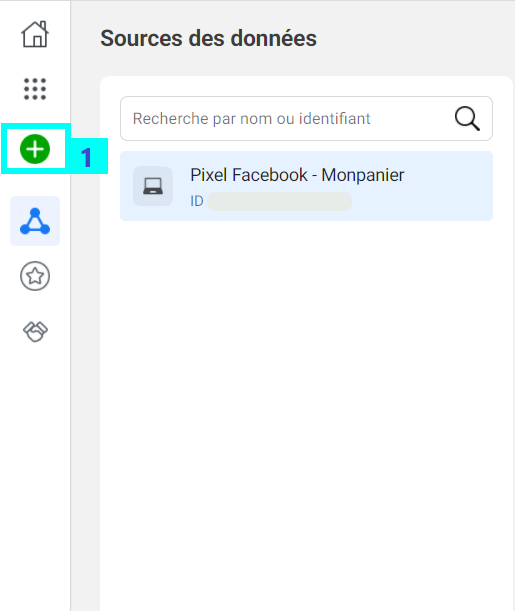
After logging in, access the Event Manager.
Click the Connect Data Sources tab (1).
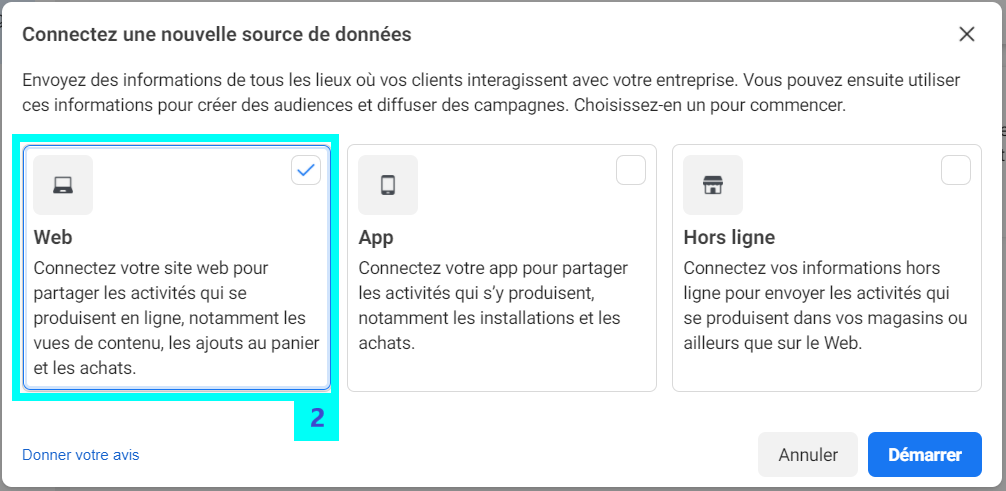
In the window that appears, select Web (2).
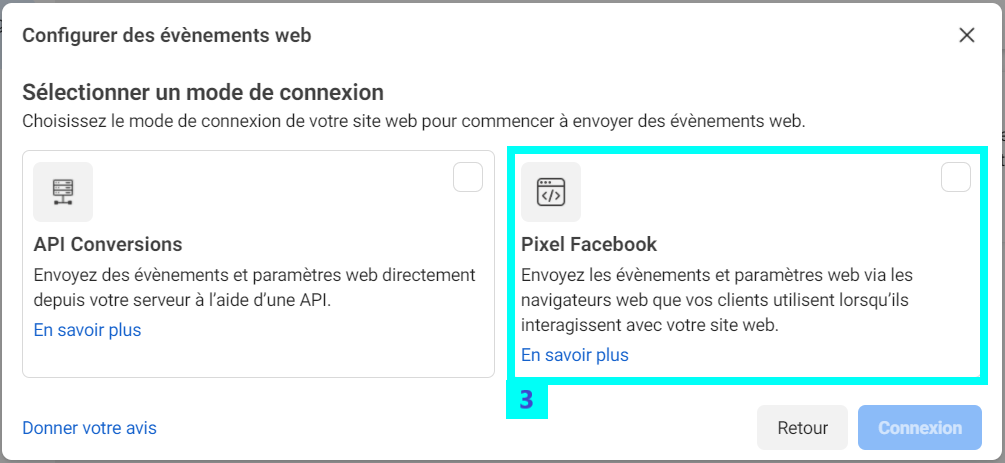
Select Pixel Facebook (3) and click Connect.
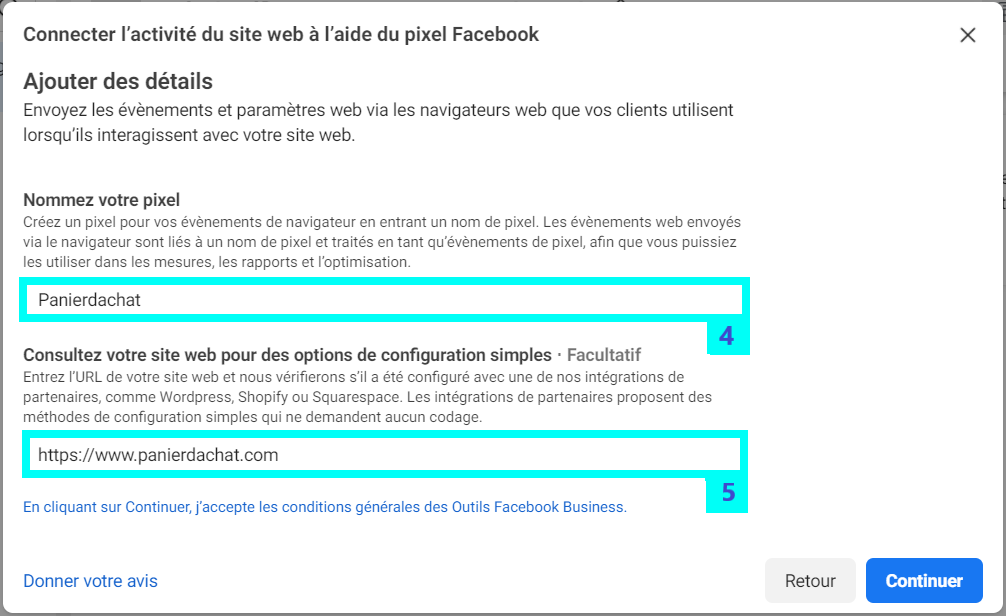
Add the pixel name (4), enter the URL of your website (5).Click Continue.
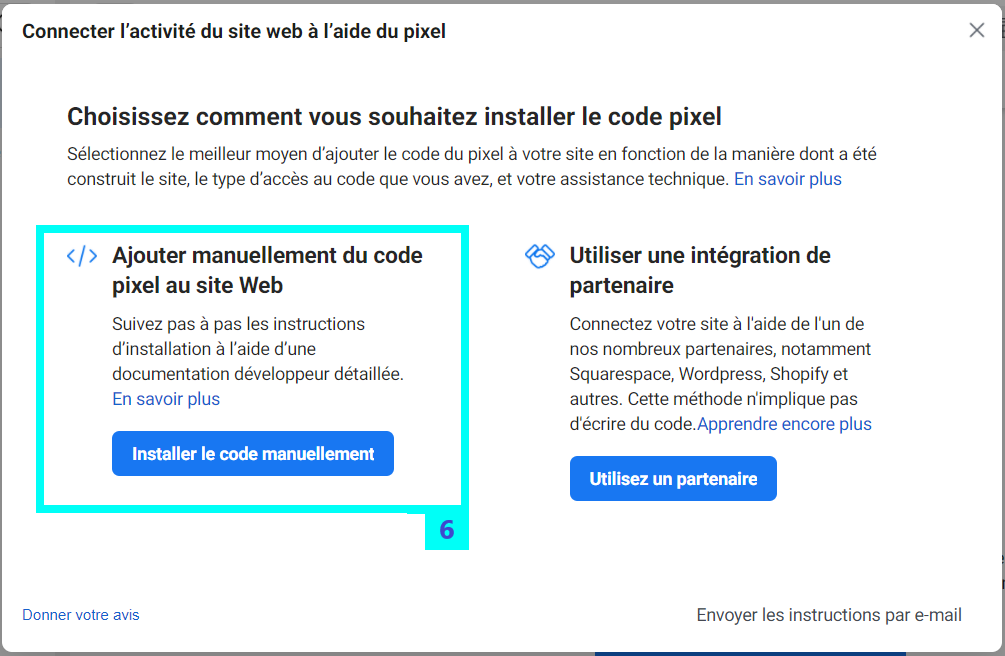
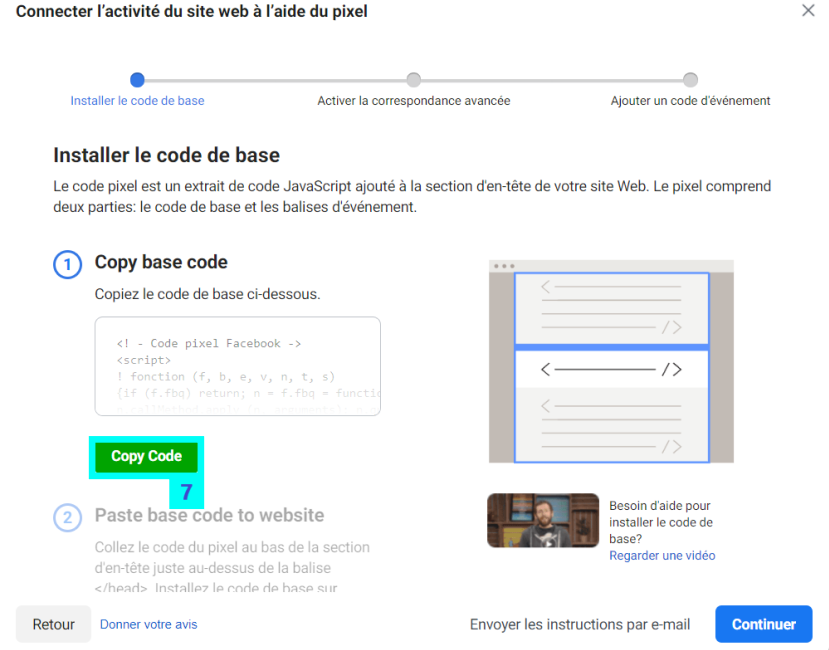
Click Install the code manually (6).
Finally, click on the Copy Code button (7).
3. Install the base code on your shop
A. How do I find the Facebook Pixel ID?
You will find a code that will look like the one below. Where the XX-XXXXXX-XX is, you will see the Facebook Pixel ID, which you will be able to copy and paste into the administration of your ShoppingCart shop, under Settings / Statistics.
<!– Facebook Pixel Code –>
<script>
!function(f,b,e,v,n,t,s)
{if(f.fbq)return;n=f.fbq=function(){n.callMethod?
n.callMethod.apply(n,arguments):n.queue.push(arguments)};
if(!f._fbq)f._fbq=n;n.push=n;n.loaded=!0;n.version=’2.0′;
n.queue=[];t=b.createElement(e);t.async=!0;
t.src=v;s=b.getElementsByTagName(e)[0];
s.parentNode.insertBefore(t,s)}(window, document,’script’,
‘https://connect.facebook.net/en_US/fbevents.js’);
fbq(‘init’, ‘XX-XXXXXX-XX‘);
fbq(‘track’, ‘PageView’);
</script>
<noscript><img height=”1″ width=”1″ style=”display:none”
src=”https://www.facebook.com/tr?id=341279130330667&ev=PageView&noscript=1″
/></noscript>
<!– End Facebook Pixel Code –>
B. How do you add it to your online shop?
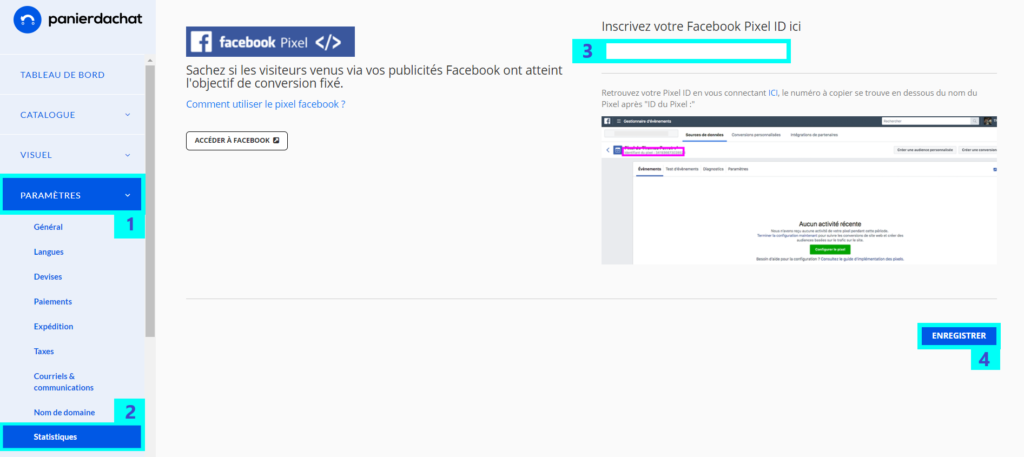
In your merchant interface, click Settings (1), then Statistics (2).
In the new page, go down to the “Facebook Pixel” section and paste the Facebook Pixel ID in the field provided (3) then click on Save (4).
4. Use the Facebook event setup tool to add events
You can also use the Facebook event setup tool to add events.
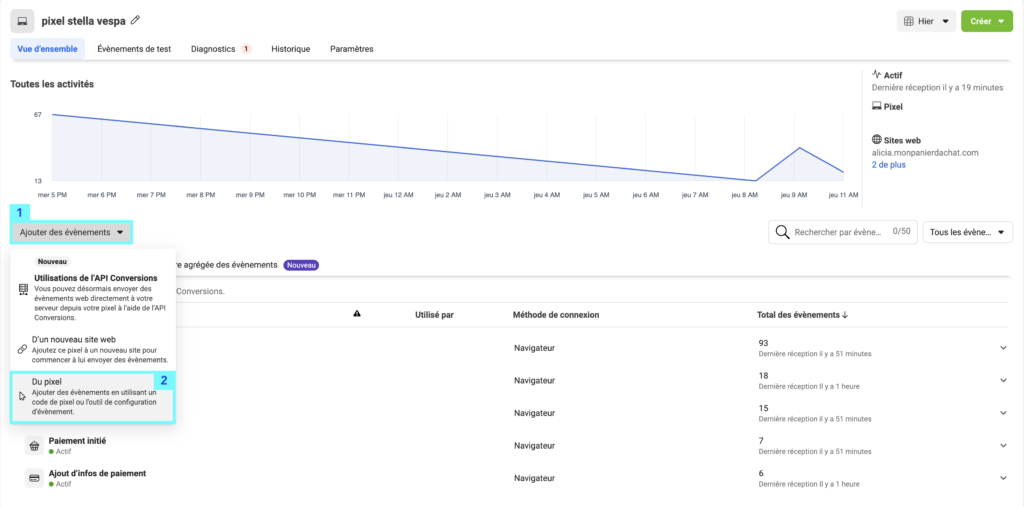
To do this, from the Event Manager, click Add Events (1), and then click From Pixel (2).
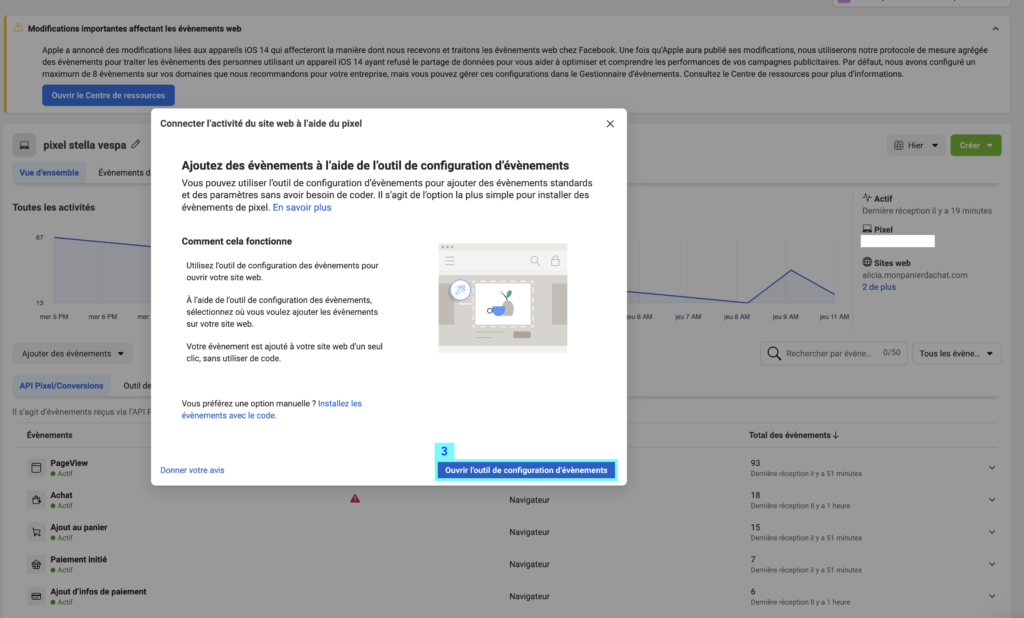
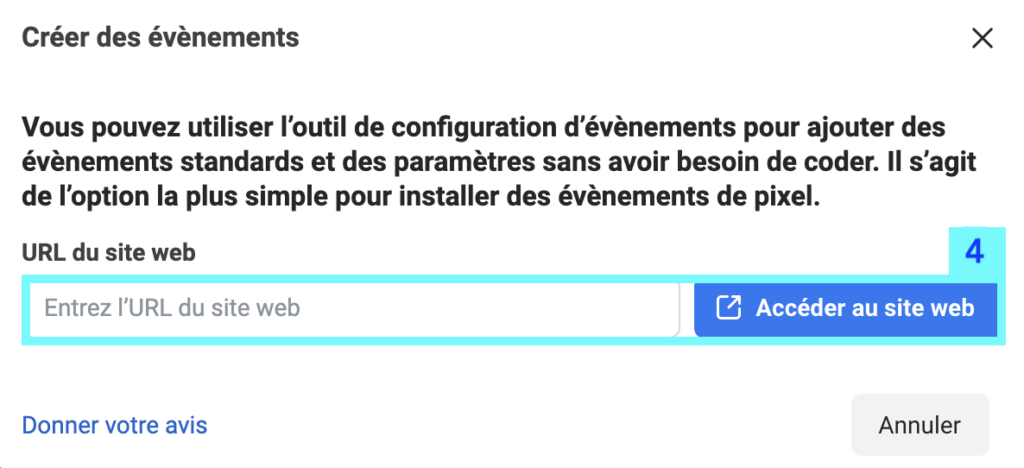
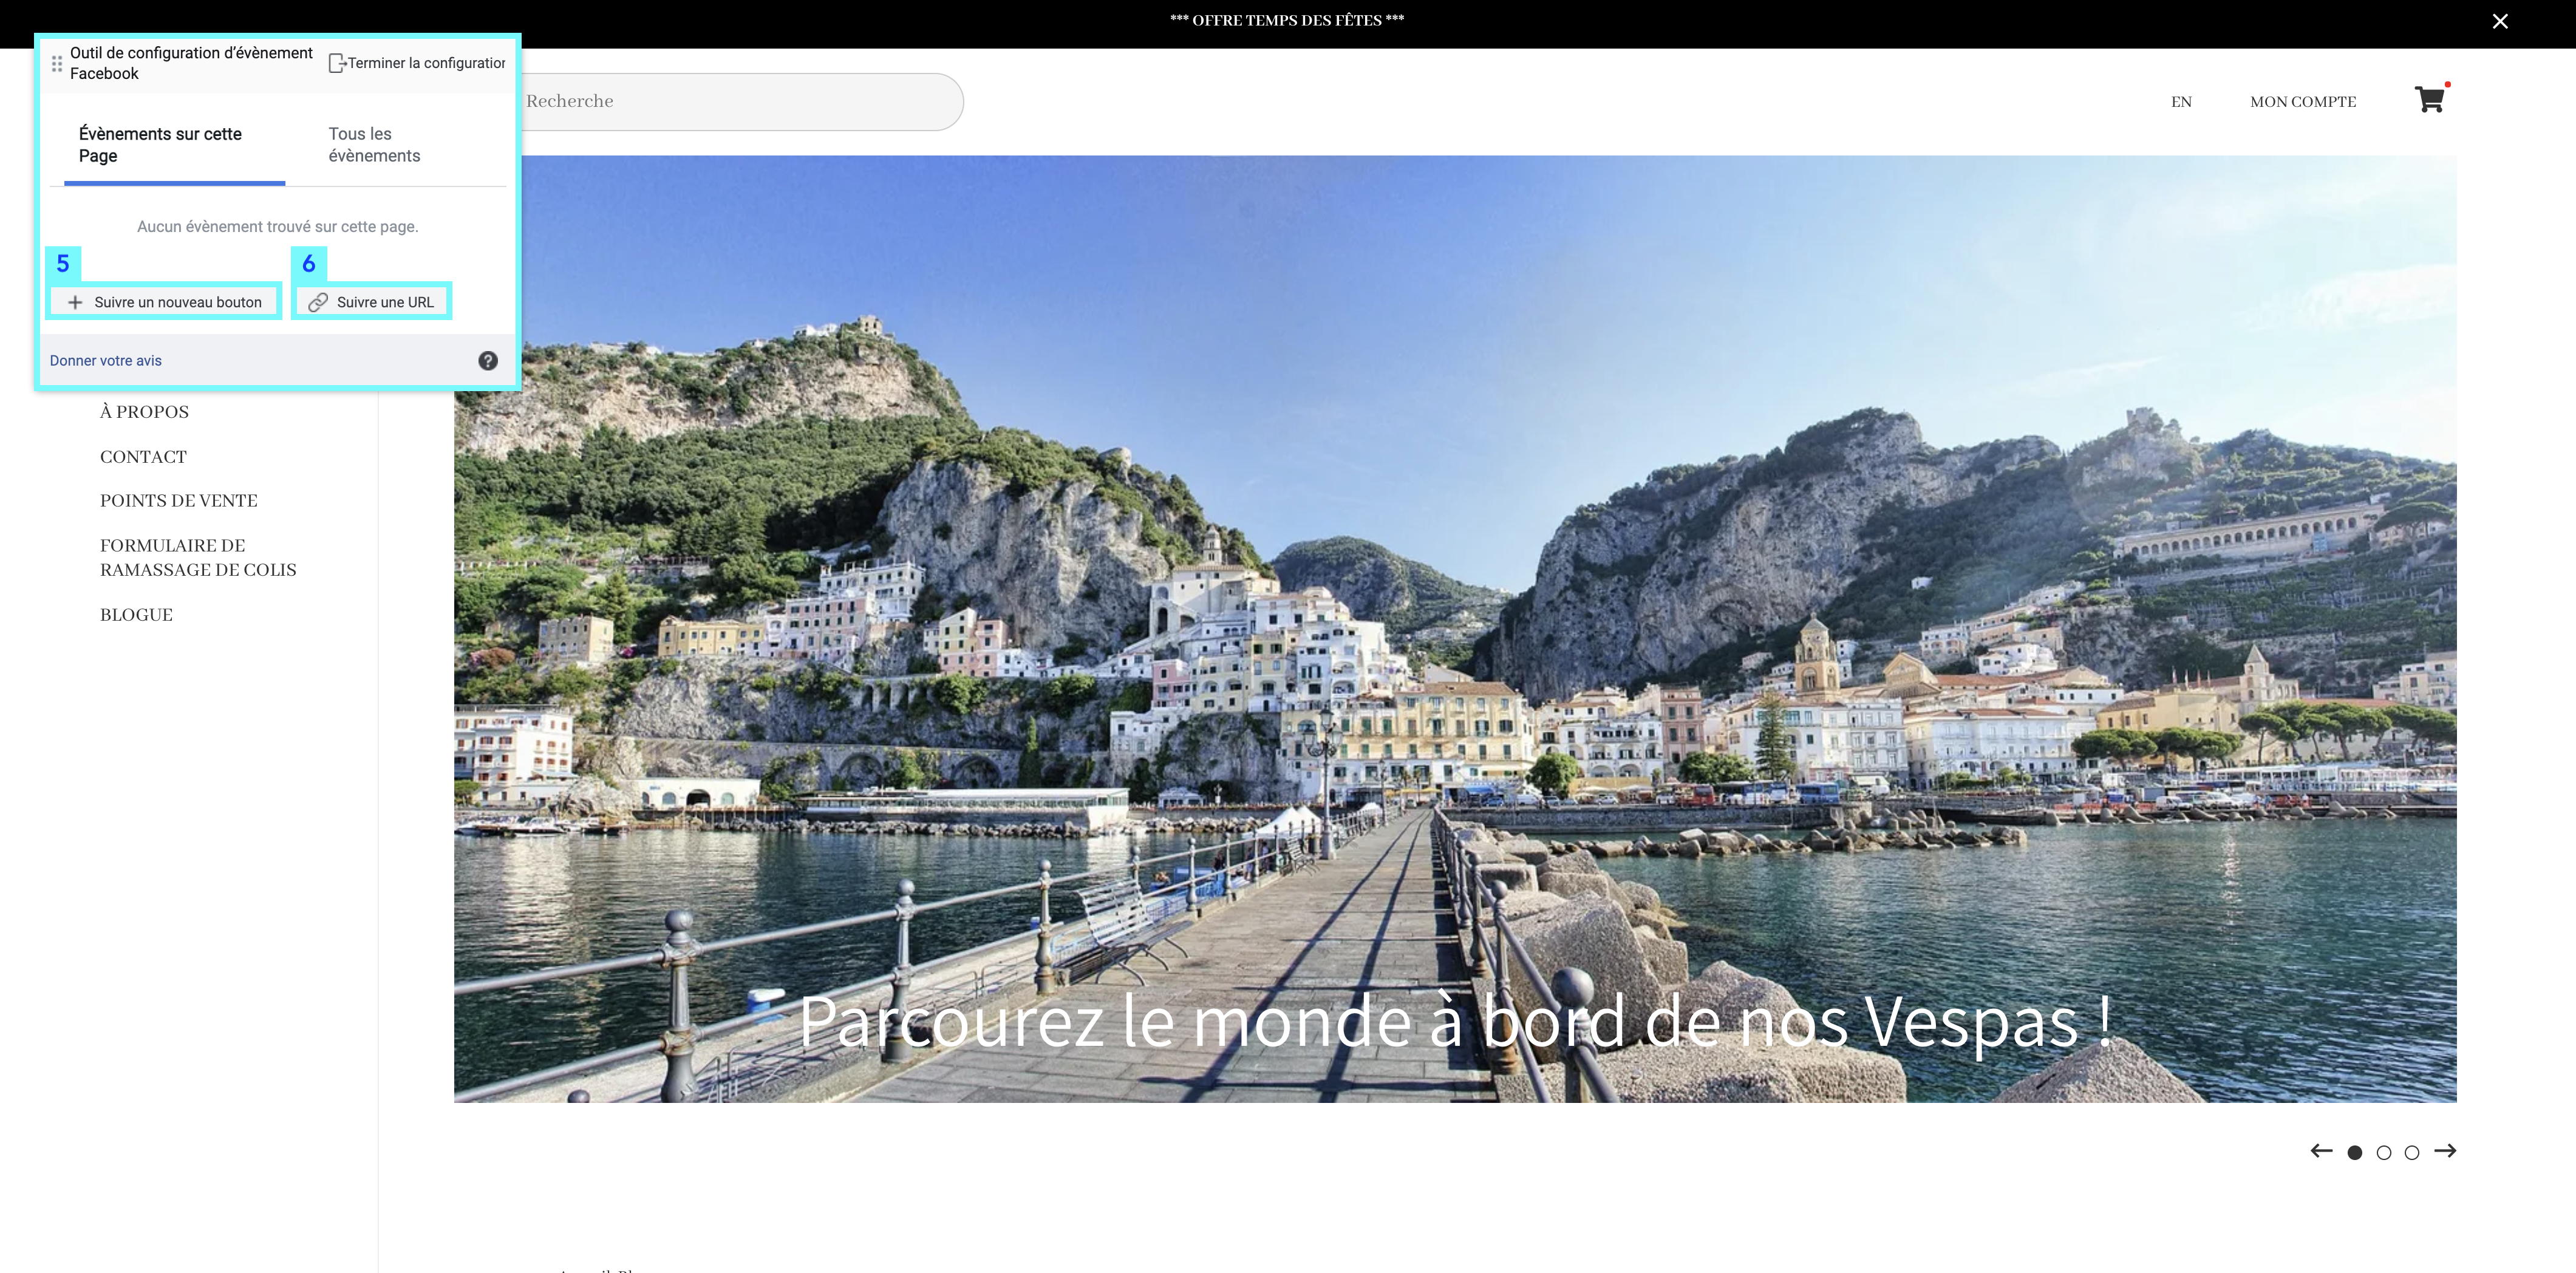
Click Open Event Setup Tool (3).
Enter the url of your online shop and click on Go to website (4).
You will be able to configure events either by following a button (5) or a URL (6) (as we have done above).
5. Install the base code and a custom event in Google Tag Manager
Or use Google Tag Manager to set up custom events.
A. Install the base code in Google Tag Manager
In Google Tag Manager, go to Tags> New> Custom HTML tag and paste the code. The <noscript> code is useless, so you are free to delete it.
![]()
So far, we have managed to do a basic implementation of Facebook Pixel via GTM. But page views alone don’t say much about what a visitor is doing on your site.
- Has the visitor just arrived on a page and left?
- Where did he or she click on something, scroll down;
- Submitted a form;
- Made a purchase?
All of these conversions can be tracked. Here’s how.
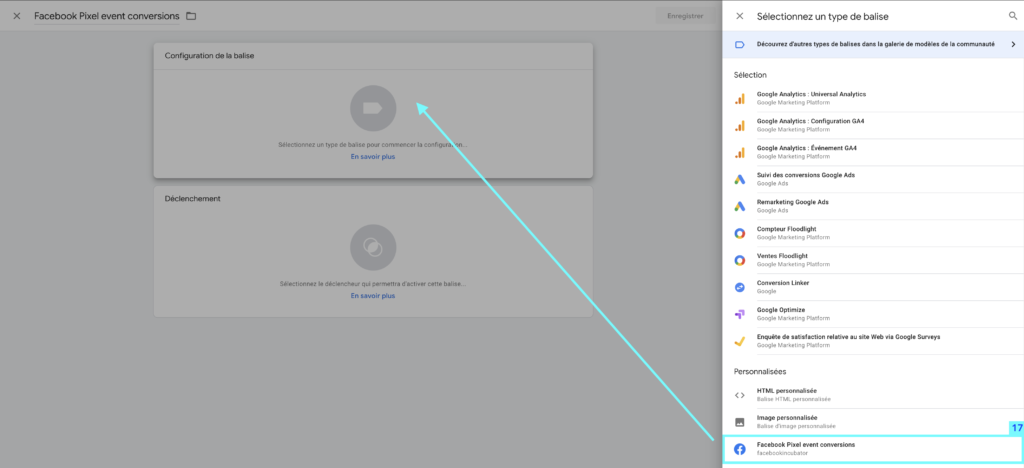
B. Add a custom Facebook pixel template
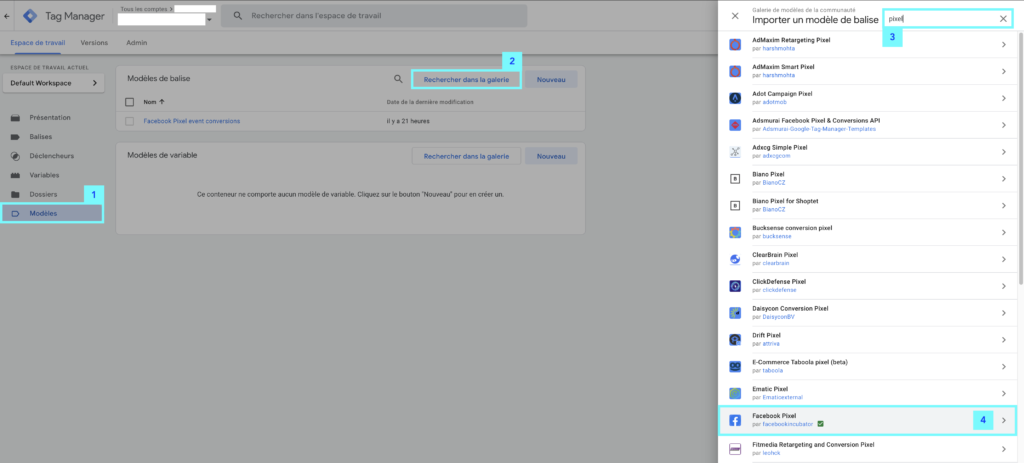
To do this, in Templates (1), click on Search in Gallery(2), search in Import Tag Template (3) and click on Facebook Pixel (4).
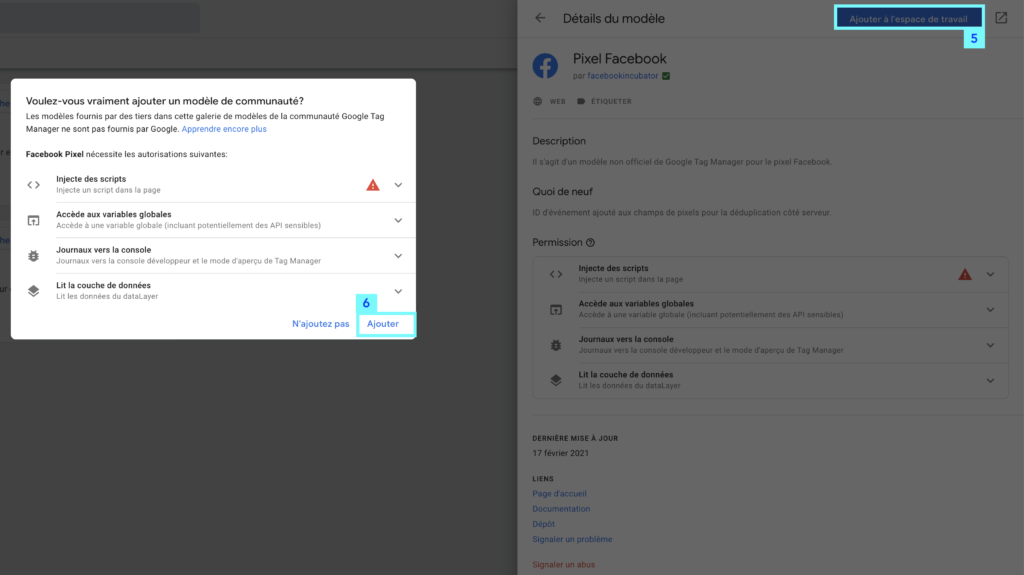
Then click Add to workspace (5) then on Add (6).
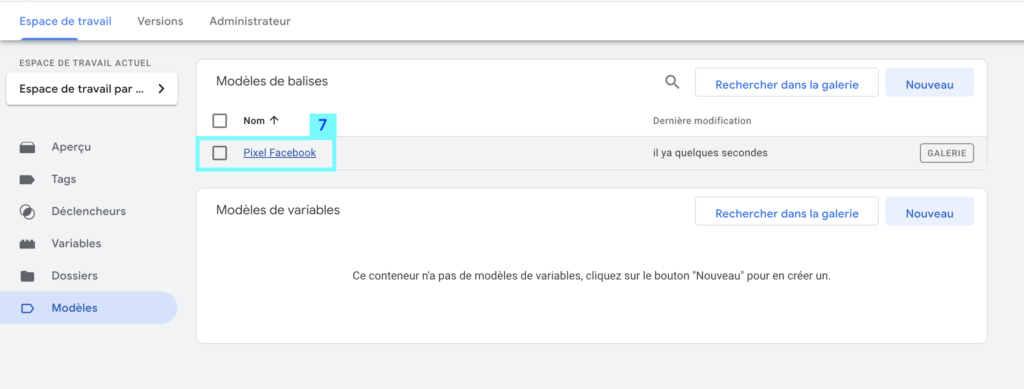
It will appear in your models (7). Click on it to configure it.
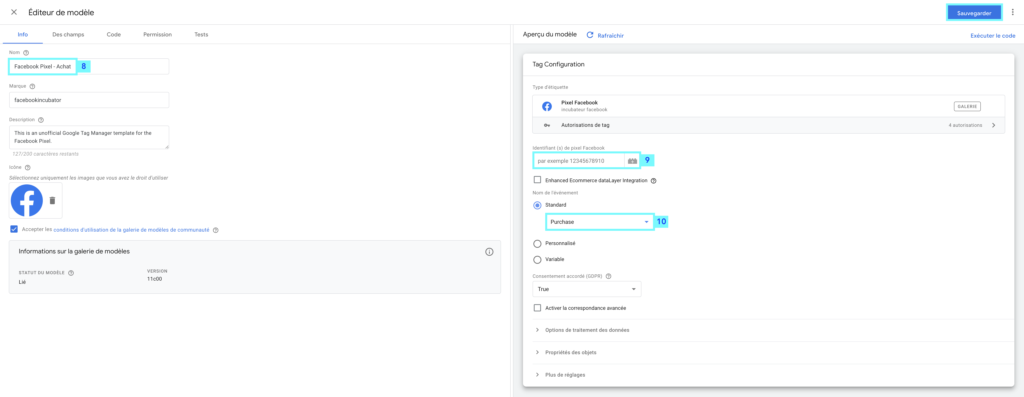
Rename it by type (8) (for example Facebook Pixel event conversions, to trac conversions), enter the Facebook id in the field (9), set the event to Purchase (10).
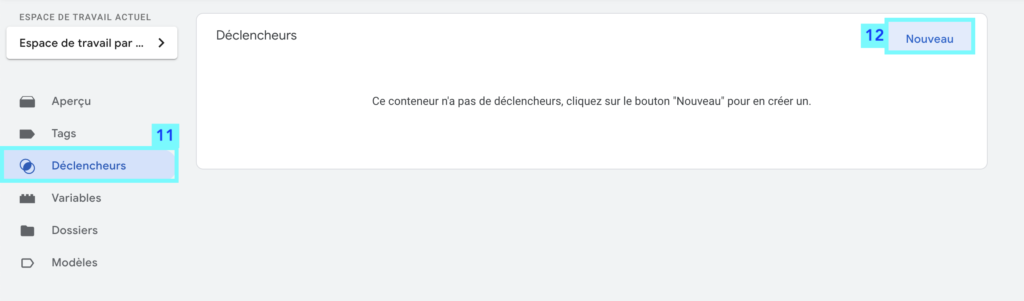
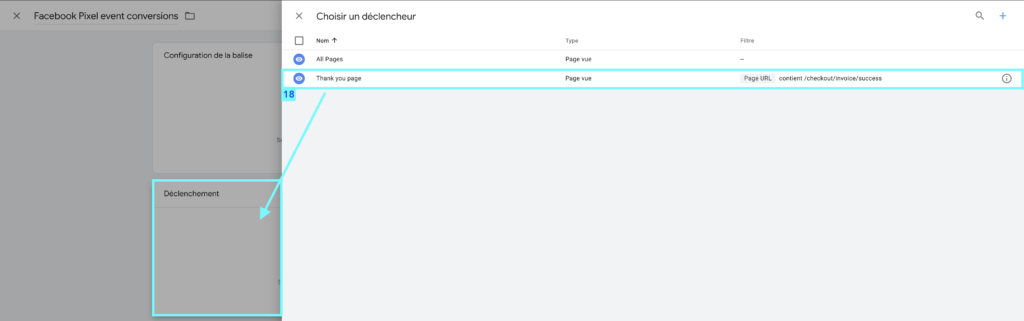
C. Setting a trigger
You need to add a trigger to indicate when the Purchase event is triggered on your online shop.
To do this, click on Triggers (11) then New (12).
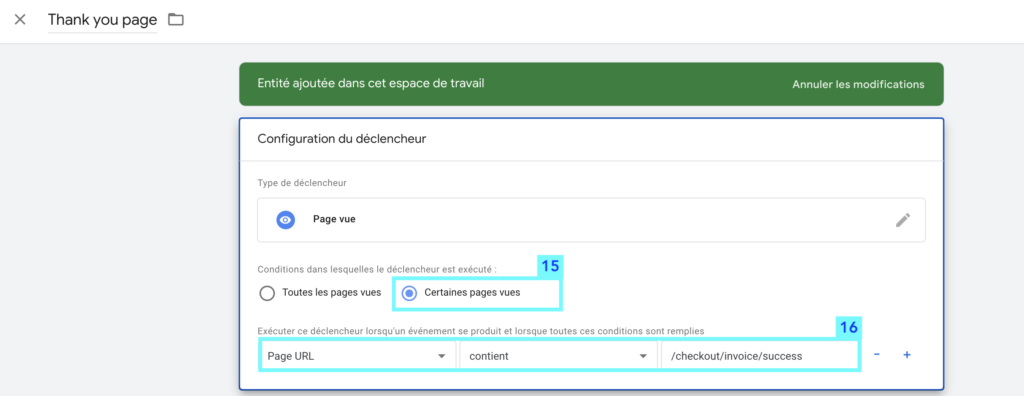
This event is triggered when the /checkout/invoice/success page appears.
To do this, name your shutter button (13) and then set the shutter button to Page View (14).

Indicate the conditions on certain viewed pages (15) and enter the url as indicated (16).
D. Associating a Beacon model with the Purchase event to the trigger
To do this, go back to the tag tab (such as point 4.A) and create a new tag, select your previously created tag template (17).
Select your previously created trigger (18).
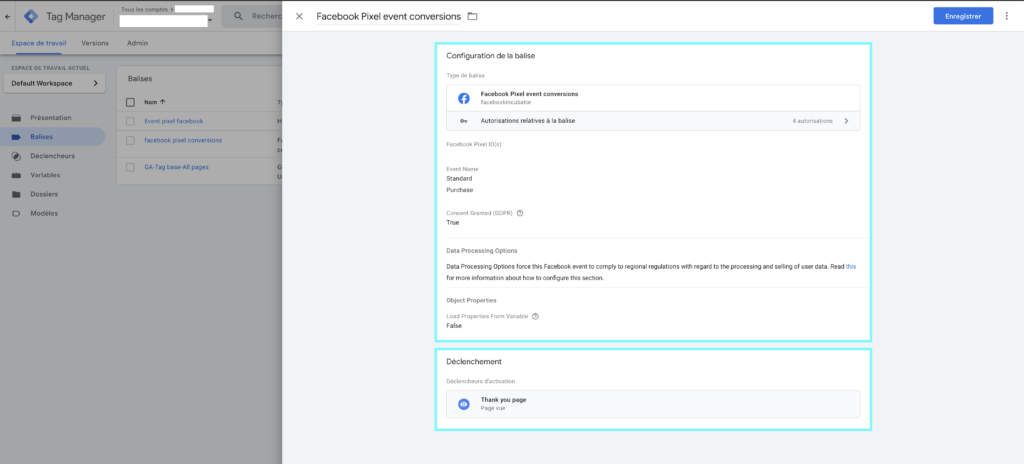
Your personalised event to track purchases on your online shop is now created.
![]()
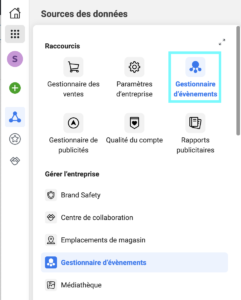
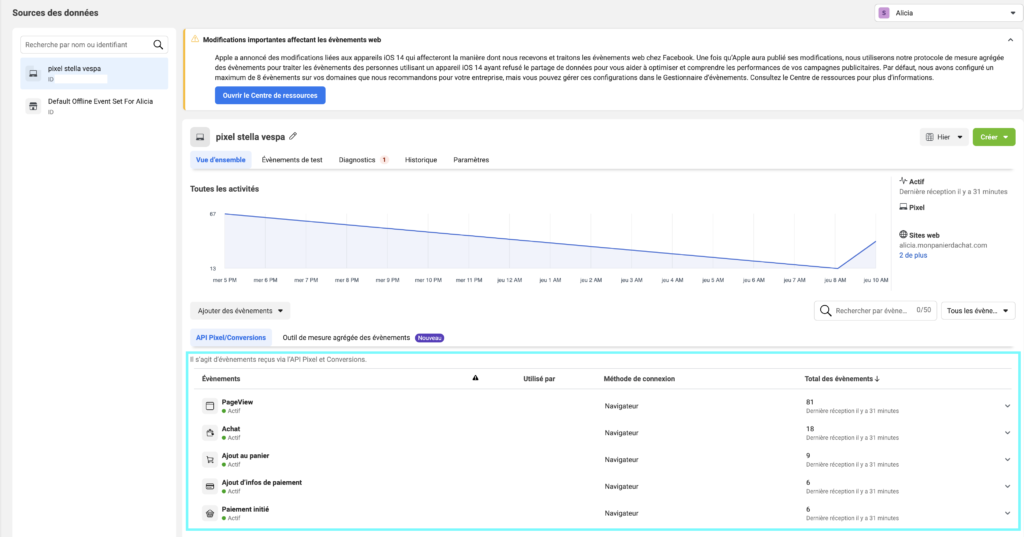
How do I know if the pixel works?
From the Event Manager of your Business Account Facebook Manager
You will see all the details of your personalised events.
Facebook has also developed a tool that will help you confirm how it works.
For more information:
https://www.facebook.com/business/a/facebook-pixel
Good sales!