

How to use the Visual Editor to customize your homepage
Panierdachat offers its merchants the possibility of creating and personalizing the home page of their store with the visual editor!
How to us the Visual Editor
Discover the Visual Editor
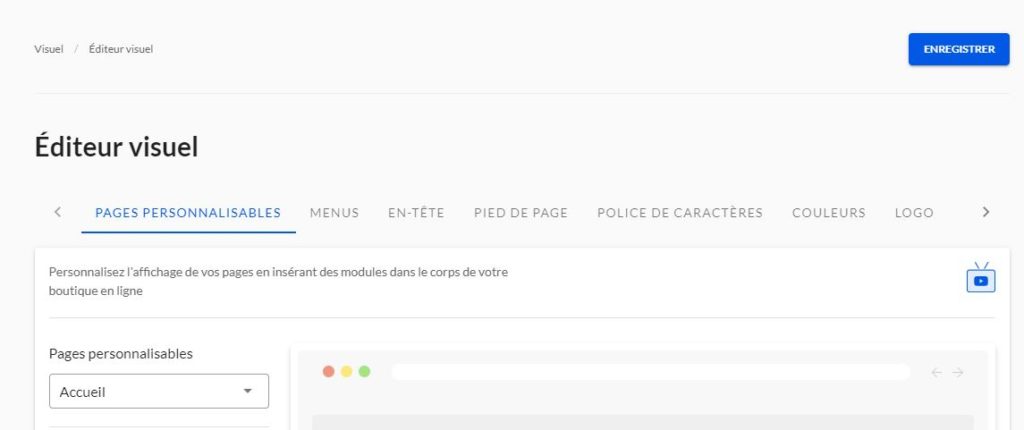
On the merchant interface, go to the Visual Editor, by clicking on the Look & Feel menu tab (1), then on Visual Editor (2). By default you will be on the Customizable pages tab (A) with the home page selected (B).
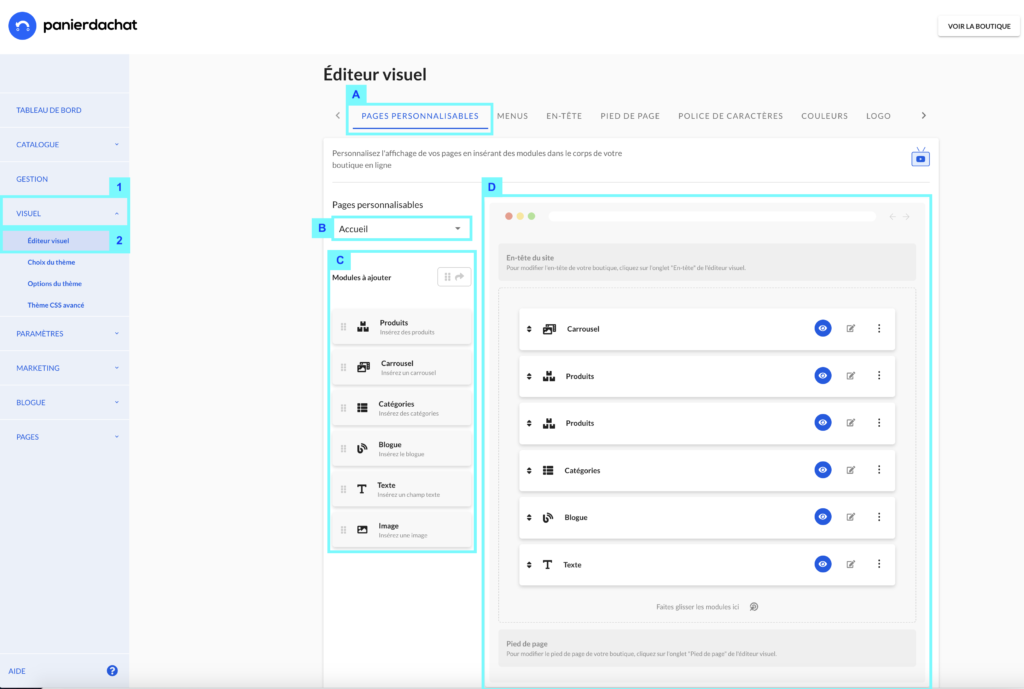
The different contents that you can add to your home page are called modules, you will find them in the Modules to add column (C). To add the one of your choice on your home page, drag it to the right sidebar (D), you can add several to the same module.
You can drag the modules up and down in the box (D) to choose the order in which the modules are displayed.
Understand the modules
You have the possibility to add 6 different modules. Once you have added the module to the Home page box, you can modify it by clicking on the “Pencil” icon (3).
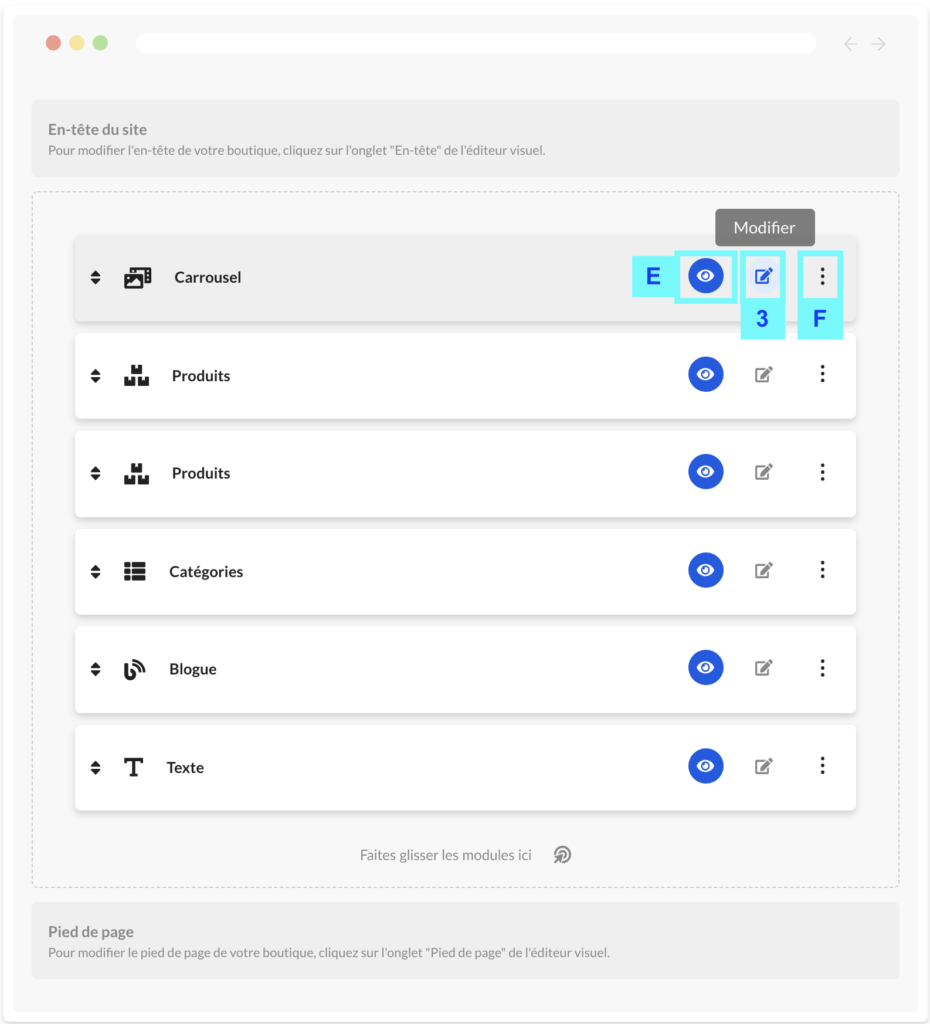
The “Eye” icon (E) allows you to display or not the module on the store, without having to delete it. The 3 dots (F) allow you to remove the module.
The Products module allows you to highlight your products in several ways.
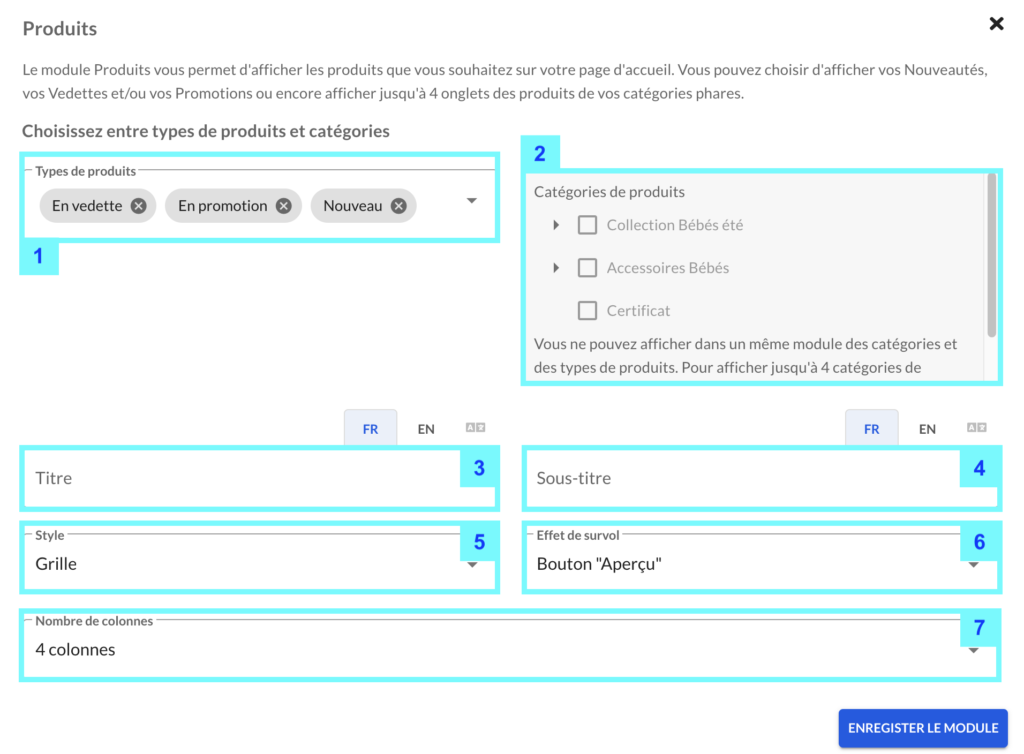
First, choose the products you want to display in this module.
You have the choice to display:
- Product types: New arrivals, Featured and / or promotion (1)
- Store categories (2)
If you select several types or categories of products (up to 4 categories), each type / category will be displayed in a tab.
With the fields (3) and (4) you can add a title and a subtitle to this module.
Choose the display style of your products (5) among the 4 styles below:
- Grid (you can select the number of columns (7))
- Horizontal slider (you can select the number of columns diplayed (7))
- Vertical slider
- Puzzle
Finally choose, the hover effect (6). This allows you to choose the reaction when the mouse cursor of your customer’s computer hovers over one of the products. On hover, you can:
- Have a small zoom on the product image
- Display a “View product” button
- Display a “Quick preview” button that opens a quick product overview window
[caption id="attachment_23249" align="alignnone" width="1024"]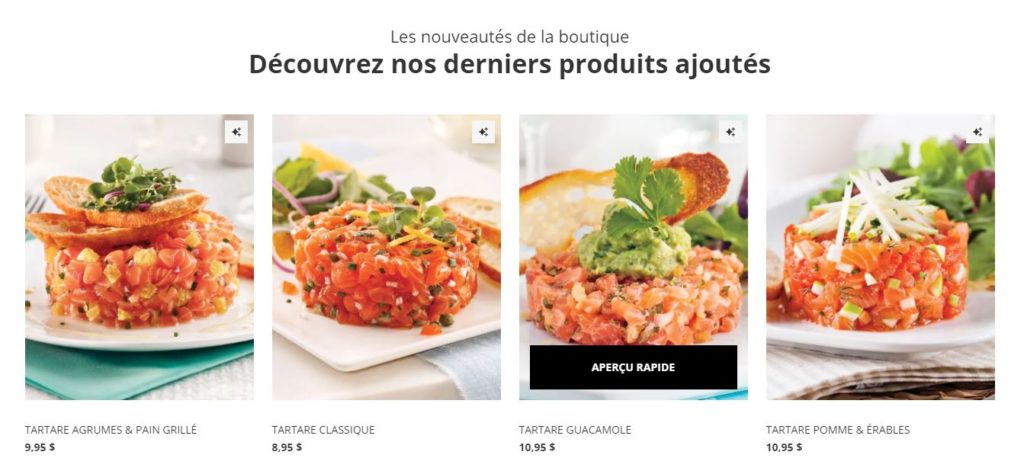 Preview of the “Quick preview” on a product listed in the online store.[/caption]
Once your module is configured and saved, remember to save your home page by clicking on the blue Save button in the Visual Editor.
The Sliders module allows you to display images and videos in a carousel that scrolls at the desired pace.
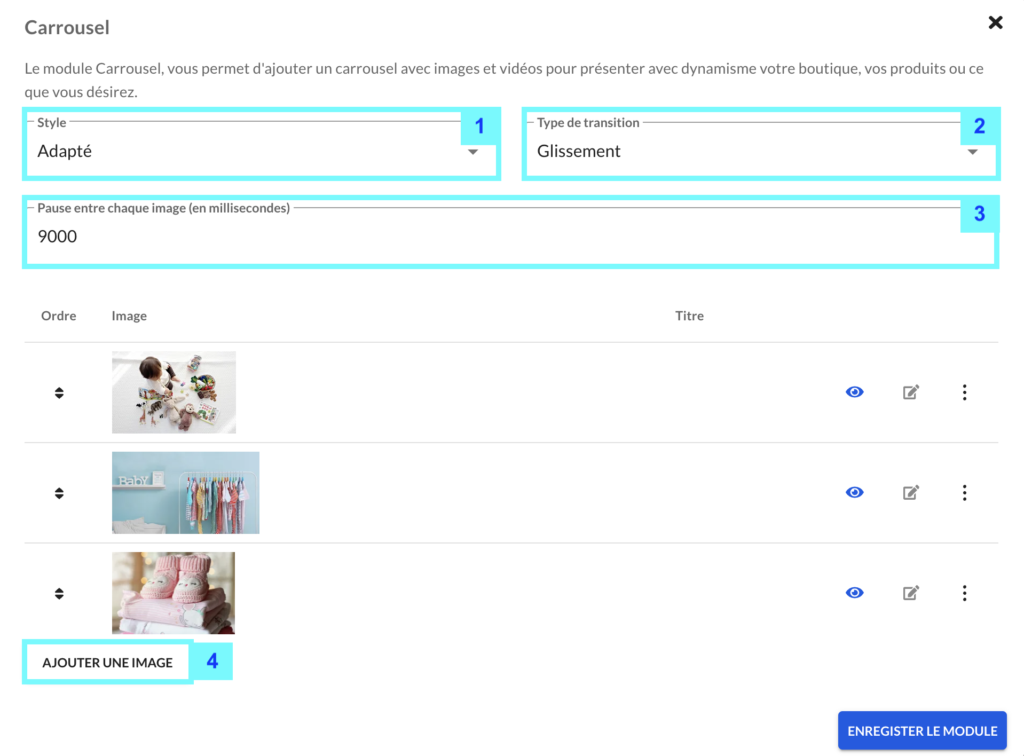
First, you will choose the style of the carousel (1):
- Full screen: Your images and videos will be stretched to take all the width of your visitors’ web window with a fixed height (Recommended)
- Adapted: The size of the carousel adapts to the dimensions of your images and therefore can change sizes with each image / video.
Then you have to choose your type of automatic transition (2):
- Slide: Your images and videos will scroll from left to right
- Fade in: Your images and videos will slowly fade to show the next image.
Finally, choose the automatic display delay of the images (3), in milliseconds. By default, the delay is 8000 ms (8 seconds).
Once these 3 general configurations have been made, you can click on the Add an image button (4).
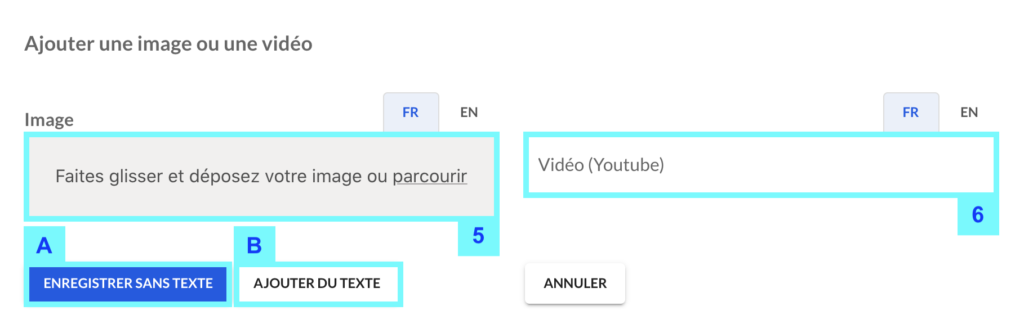
Add the image by clicking on Browse (5) or the video (6) by adding the Youtube link of the latter. You can put a different image or video per language of your store if you want.
Once this content has been added, you can Save without text (A) or add text over the image (B).
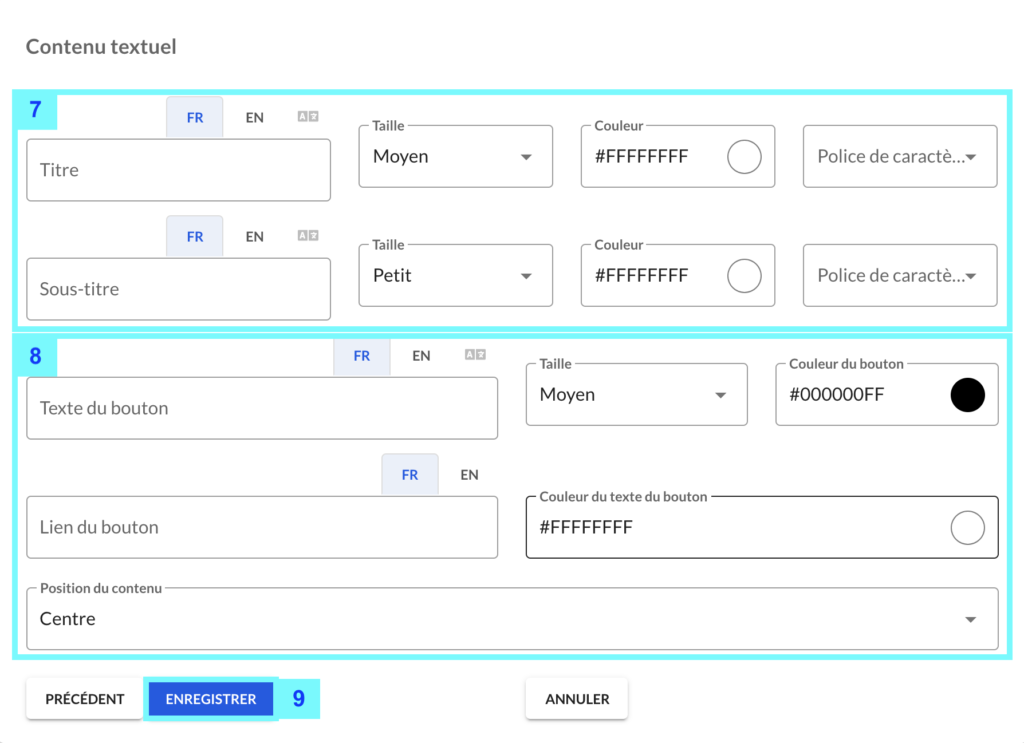
Here you can add a title and a subtitle, choose the color, size and font (7). You can also add a button (8) with a link by choosing the size and colors. Finally you can choose the position of this text block.
Once the textual content has been added, you can click Save (9). You can then add new images or save the module by clicking on Save this module (10).
Once your module is configured and saved, remember to save your home page by clicking on the blue Save button in the Visual Editor.
The Categories module allows you to display the images of the categories you have chosen from “Display on home page”.
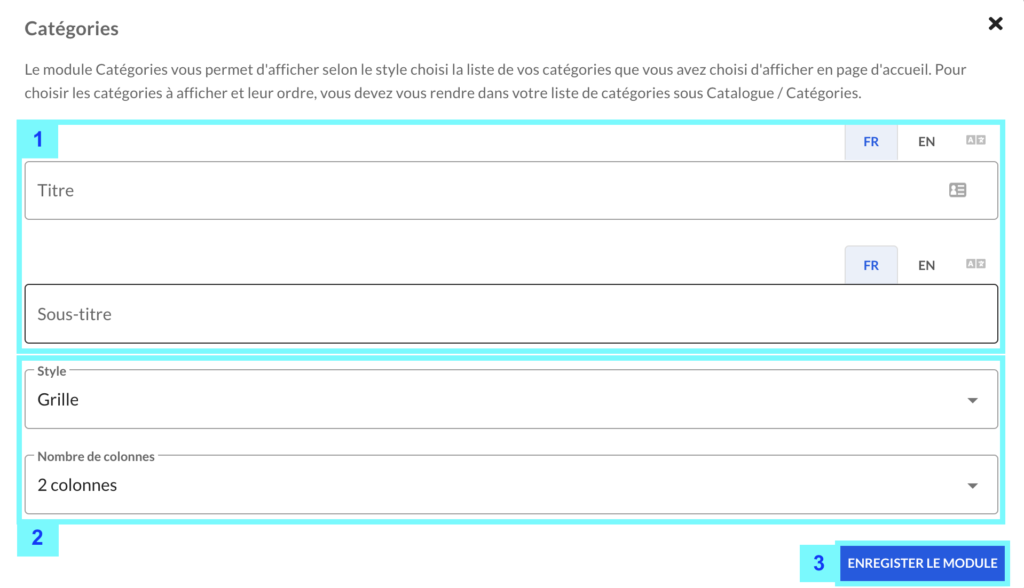
You can first choose a title and a subtitle (1).
Then choose one of the 3 display styles (2):
When done, click Save this module (3).
Once your module is configured and saved, remember to save your home page by clicking on the blue Save button in the Visual Editor.
The Blog module allows you to display the blog posts that you have chosen to be “Featured”.
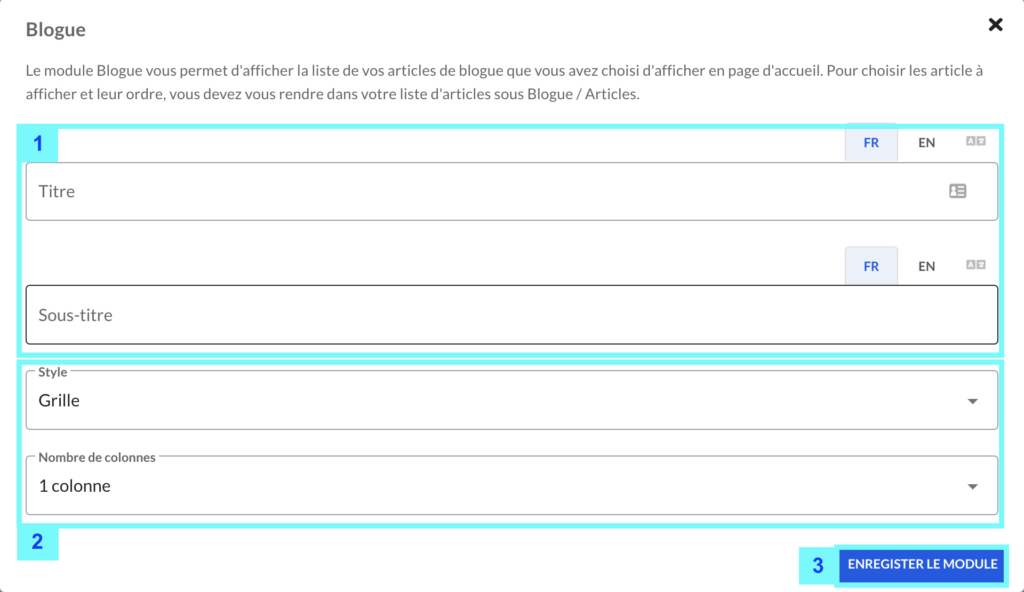
As for the Categories module, you can choose a title and a subtitle (1).
Then choose one of the 2 display styles (2):
- Grid (you must then choose the desired number of columns)
- Preview
When done, click Save Module (3).
Once your module is configured and saved, remember to save your home page by clicking on the blue Save button in the visual editor.
The Text module allows you to display a text or an HTML code of a pluggin or an application.
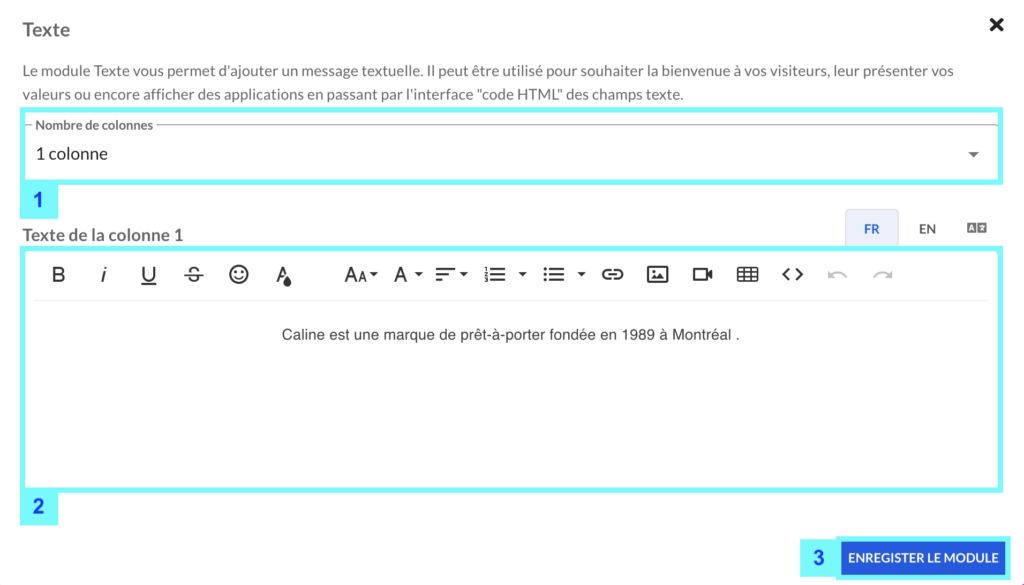
You can choose the number of text column you want to display with this module (1). With the text field (2), you can lay out your text as you see fit.
In order to add an HTML code, you can click on the icon (A).
Once your text is laid out, click on Save module (3).
The Images module allows you to display an image on your home page with a text and the style you want.
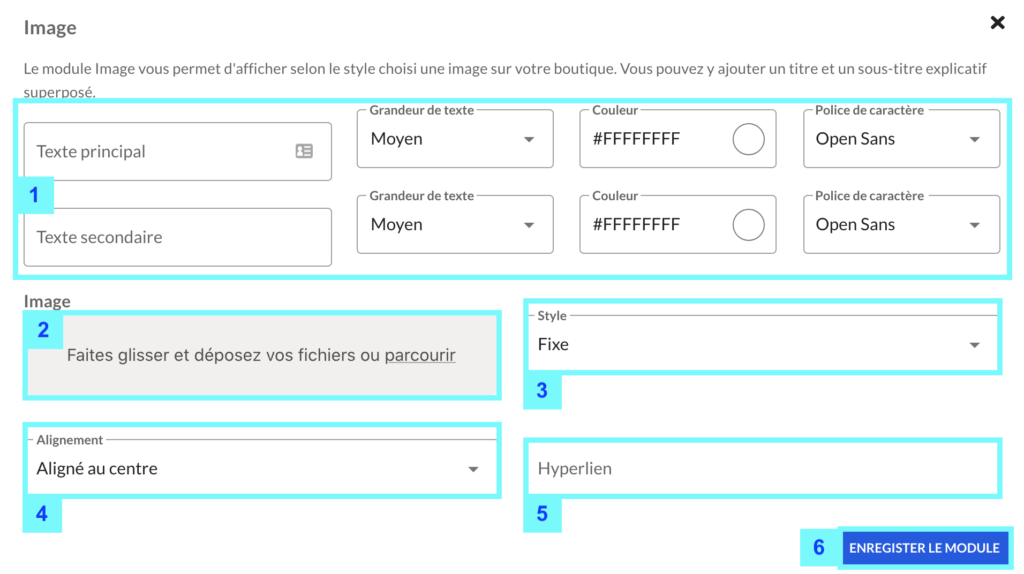
First of all, you can add two text parts (1) (primary and secondary) by choosing their size, color and font.
Then add the image you want (2).
Choose the style (3) between these 3:
- Fix: the dimensions of your image are respected and the display is the default.
- Parallax: discover the “parallax” effect by testing it.
- Full Width: The width of the image is stretched to fit the full width of the window.
Choose the alignment of the text (4) and finally you can make your image clickable by adding a link (5).
Once the module has been configured as desired, click on Save module (6).
Once your module is configured and saved, remember to save your home page by clicking on the blue Save button in the Visual Editor.