How to add and upload your product catalog to Google Shopping?

What is its purpose?
How to add and upload your product catalog to Google Shopping?
1. Add your products in Google Shopping categories
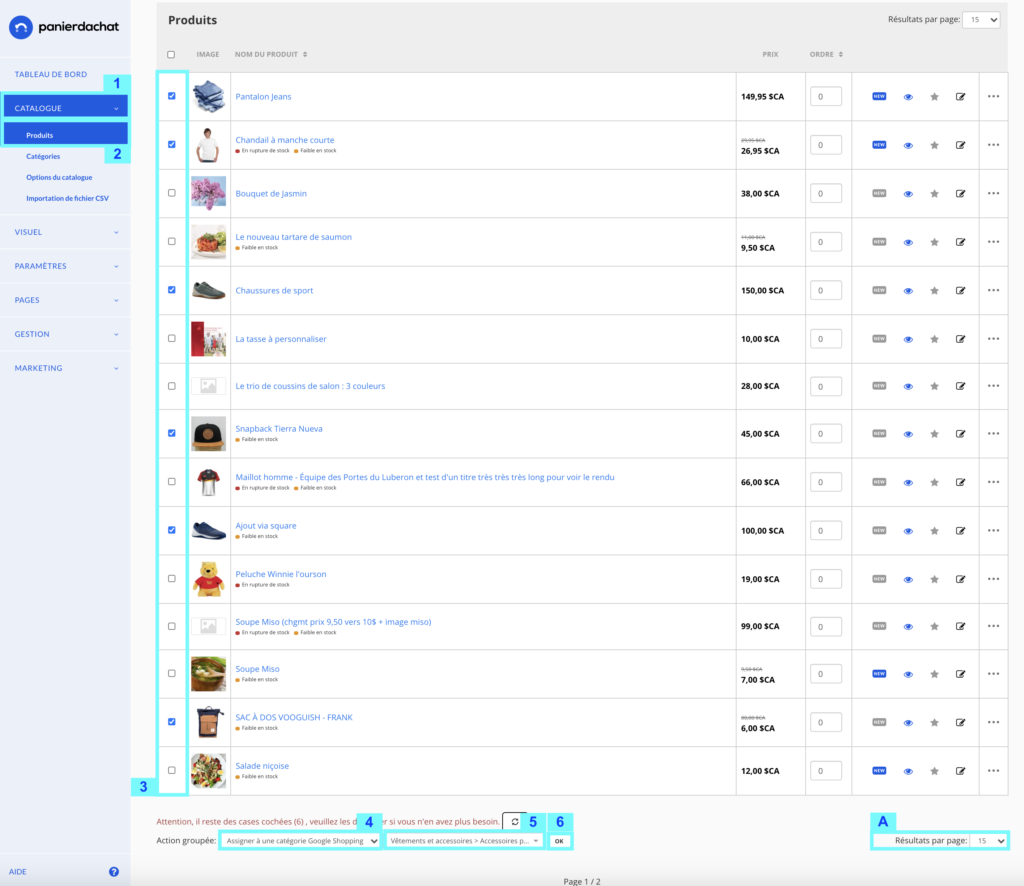
From your merchant interface, click on the Catalog tab (1) then Products (2).
In your product list, you can select the products you wish to add to a category by checking their respective box (3). You can change page to check all the products you want without losing your selection. To make your selection easier, you can increase the number of products displayed per page (A).
At the bottom of the table, after “Grouped action”, click on Choose an action and choose Assign to a Google Shopping category (4). Then, in the drop-down list, choose the corresponding category (5) and click on OK (6).
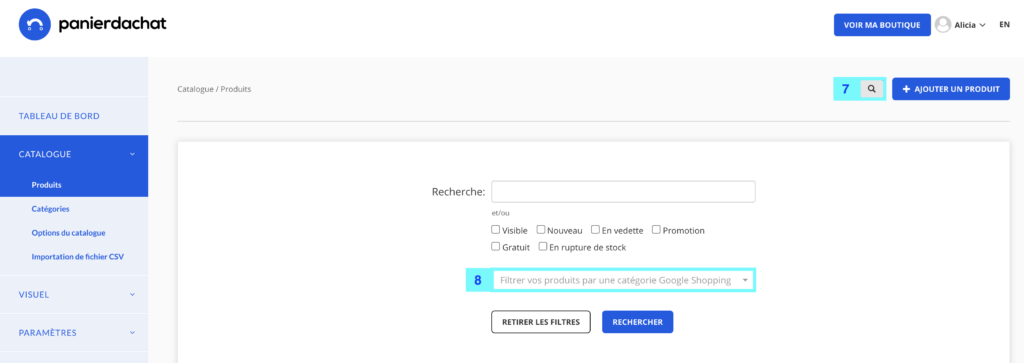
If you wish to verify that your products have been assigned to the category, you can use the search filter (8) by clicking on the magnifying glass (7).
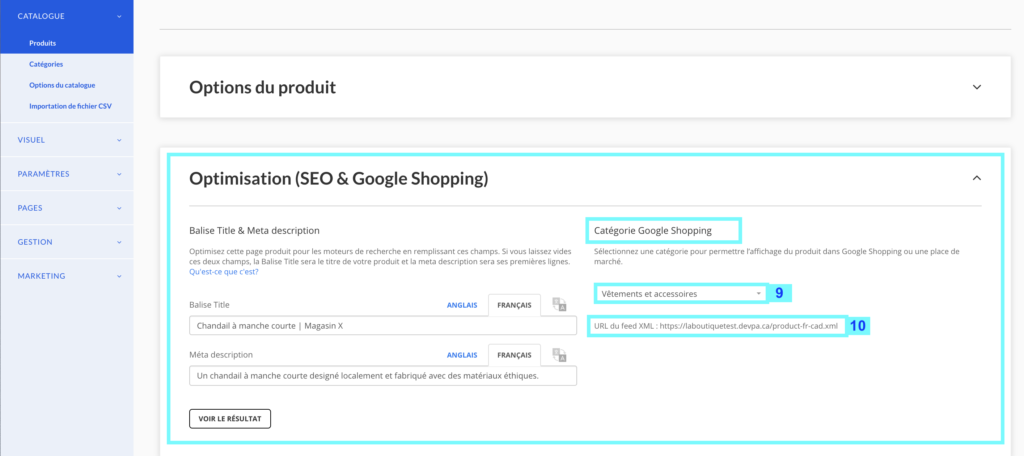
You can also assign a product or find out which category it belongs to by going to the Optimization tab (Seo & Google Shopping) (9) of your product file.
You will also find the url of the XML feed (10) that you will use afterwards.
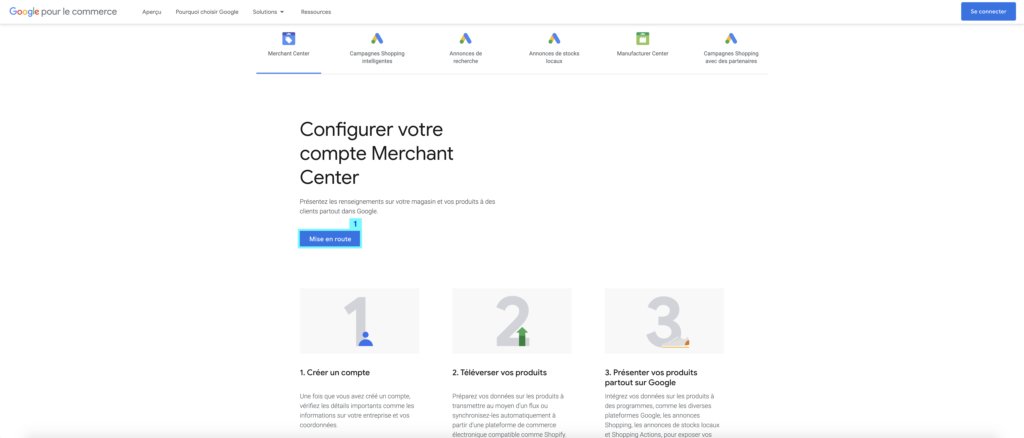
2. Create a Google Merchant Center account
Then sign in with your Google credentials.
Enter your company information(1). In the second section, choose On My Site (2) so that your customers, after clicking on your product’s Google listing, access your online store to make the purchase.
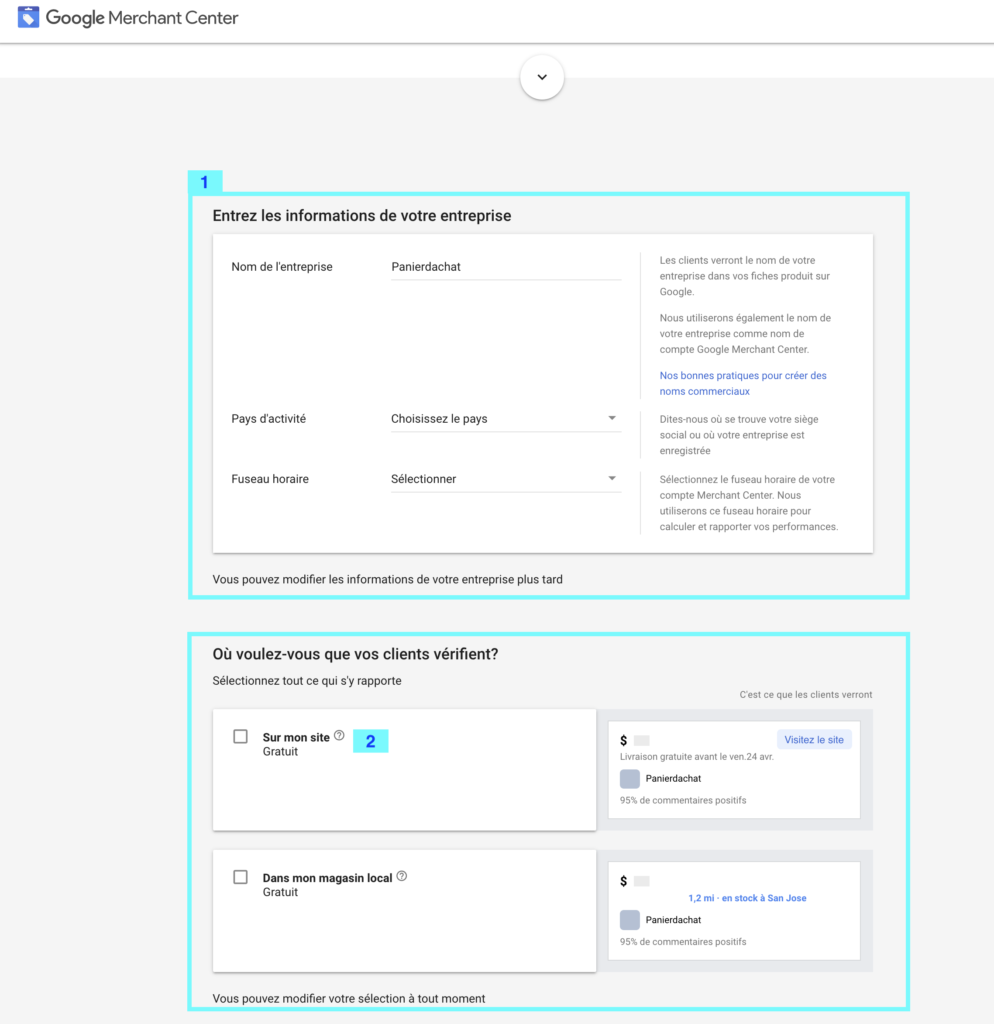
Configure your email preferences (3), accept the Google Merchant Center terms of use (4). and then click on Create an account (5).
![]()
Your account is now ready.
3. Check the link to your Shopping cart online store
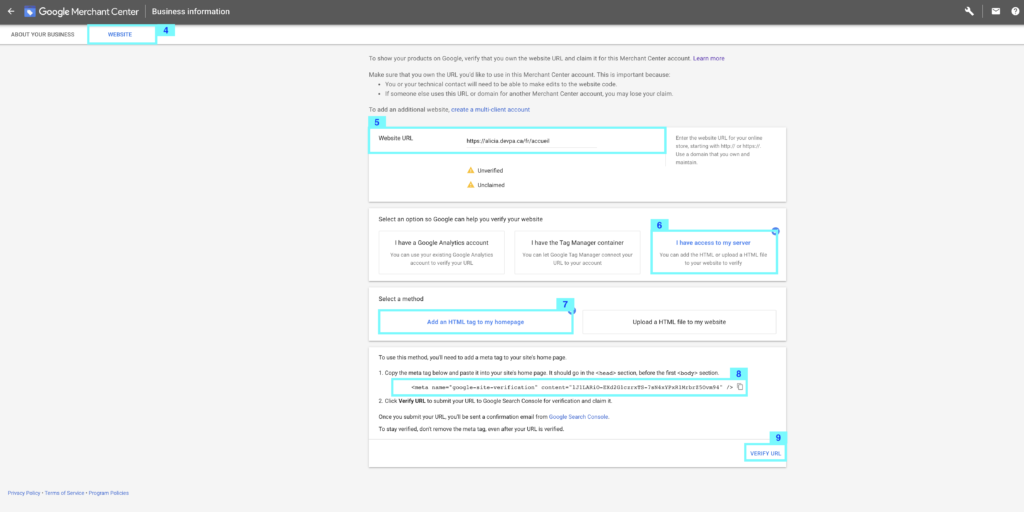
From the Google Merchant Center interface, click on the Settings tab (1), then in the drop-down list select Settings (2) then Business Information (3).

Then select the website tab (4).
Enter the url of your shopping cart online store (5), click on I have access to my server (6), then on Add an HTML tag to my homepage (7). Finally, copy the information contained in the field (8) and click on Check url (9).
4. Add the meta tag on your Merchant Interface
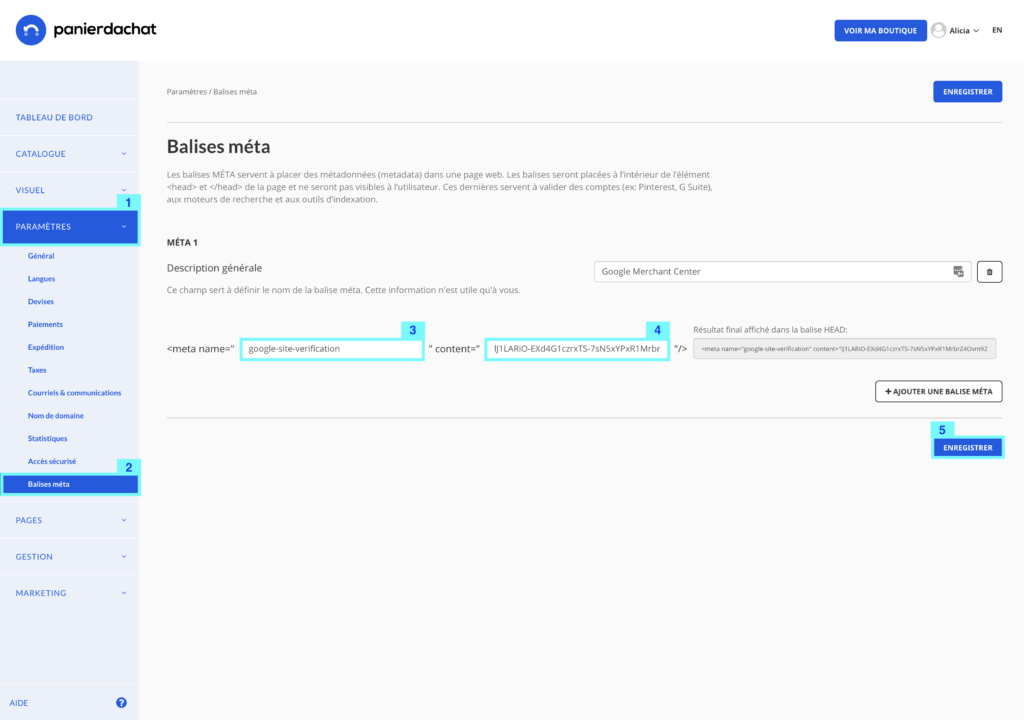
From your Merchant Interface, go to Settings (1) then Meta Tags (2).
Copy the information from the field (8) into the fields provided for this purpose, i.e. the first part of the meta name (3) and the content (4) then click on Save (5).
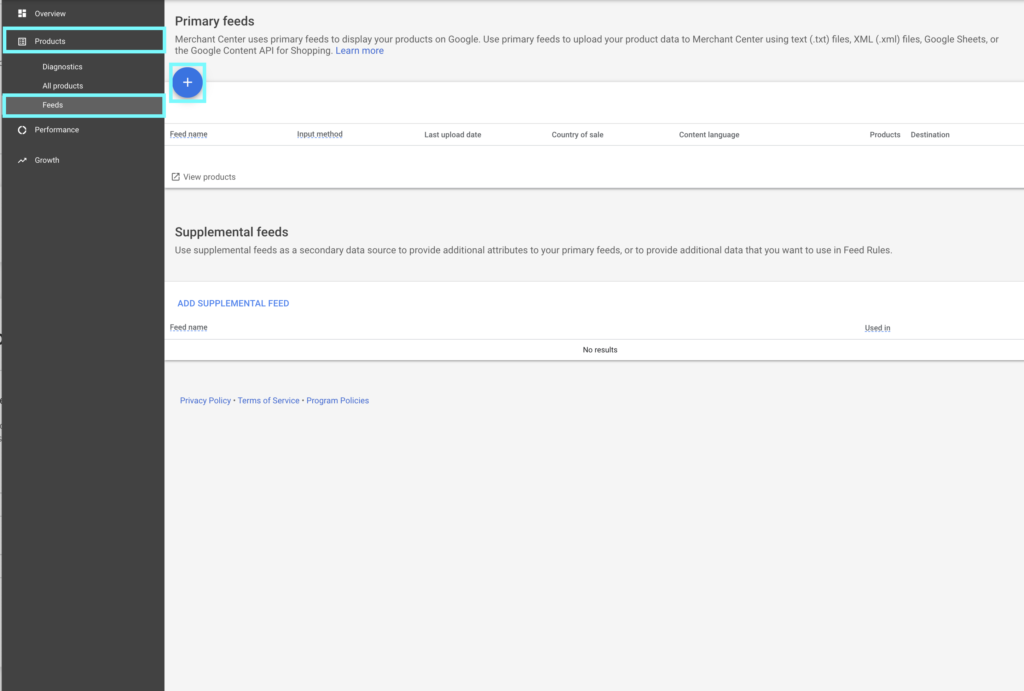
5. Add a Feed on Google Merchant Center
Go back to the Google Merchant Center platform, then click on Products (1), Feed (2) and then the + button (3).
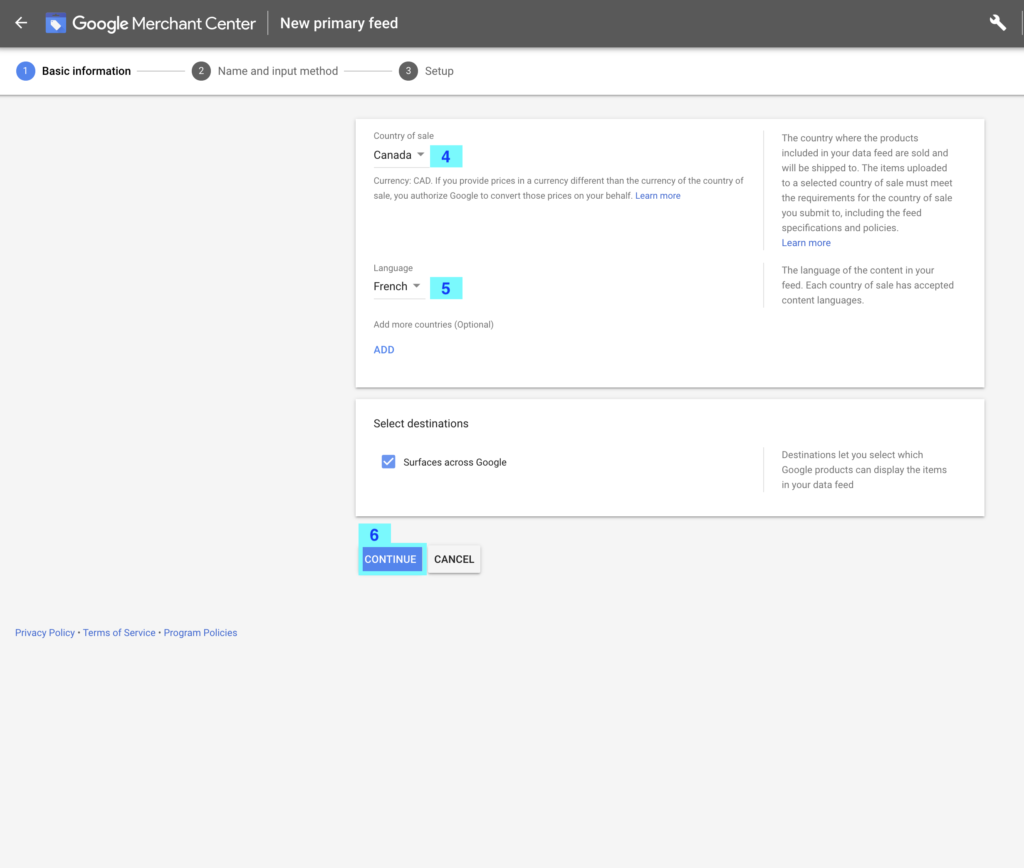
Select the country (4), language (5) and then click on Continue (6).
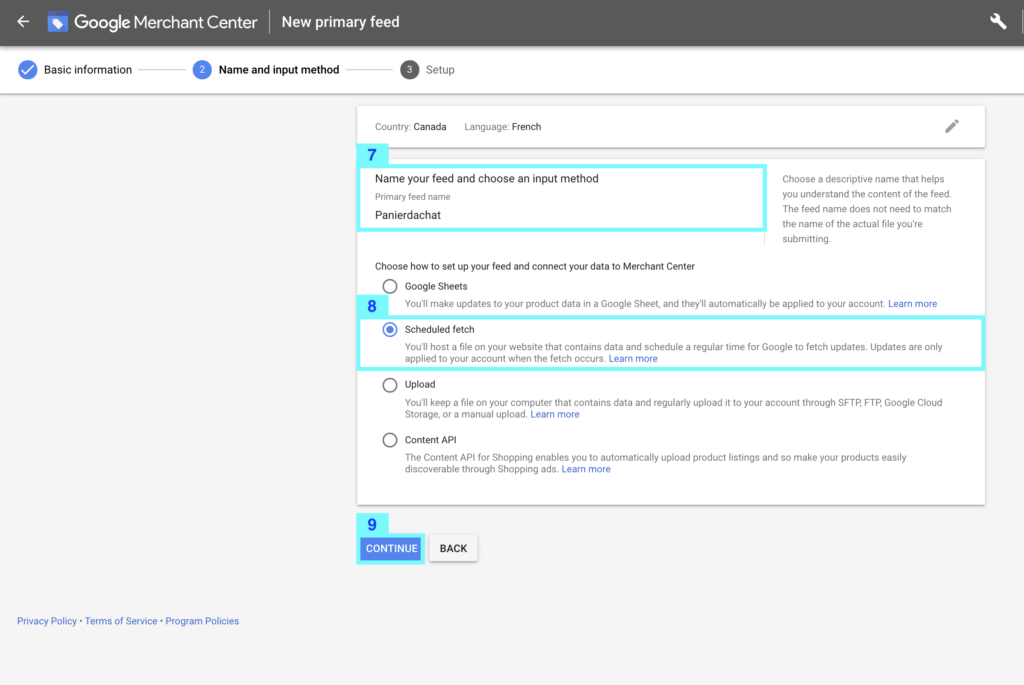
Enter a name for your product feed (7), select Scheduled Fetch (8) then click Continue (9).
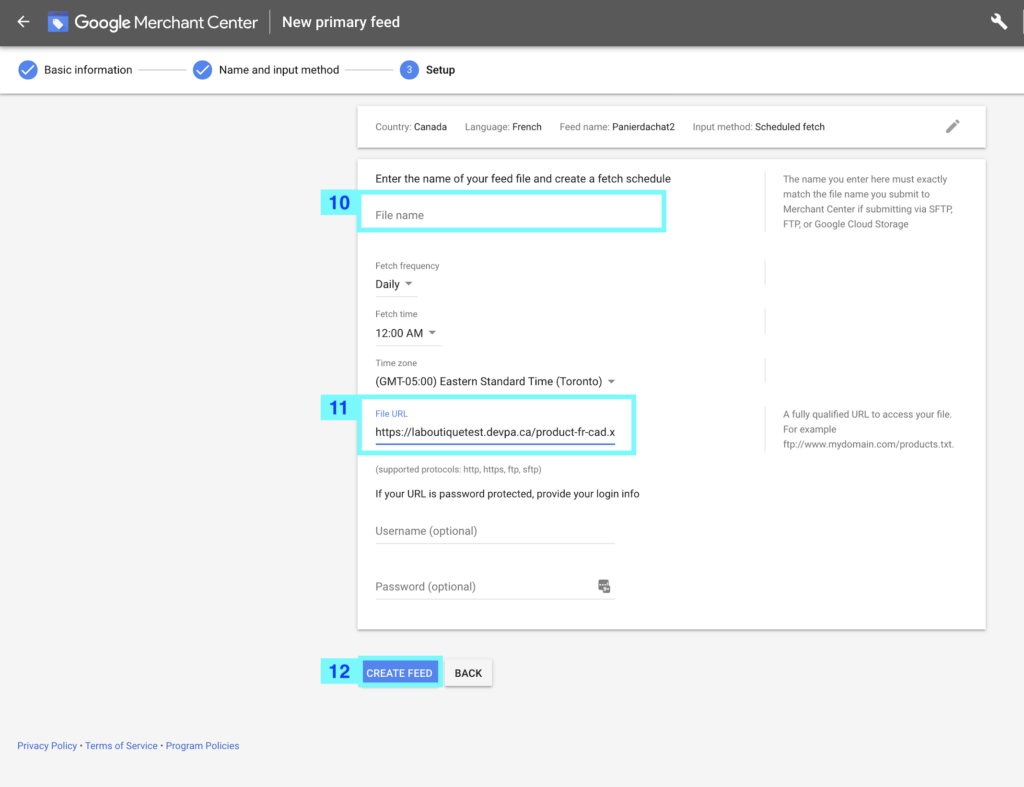
Enter the name for your product feed again (10). In the field (11), copy the url of the xml feed (provided in Part 1 of this article, point (10)) then click on create feed (12).
Once created, click on the name of your feed (13).

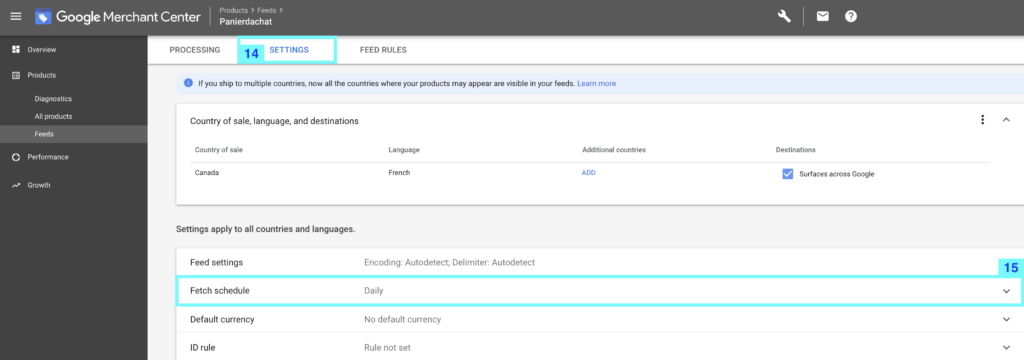
Select the Settings tab (14) then select the Fetch Schedule drop-down list (15).
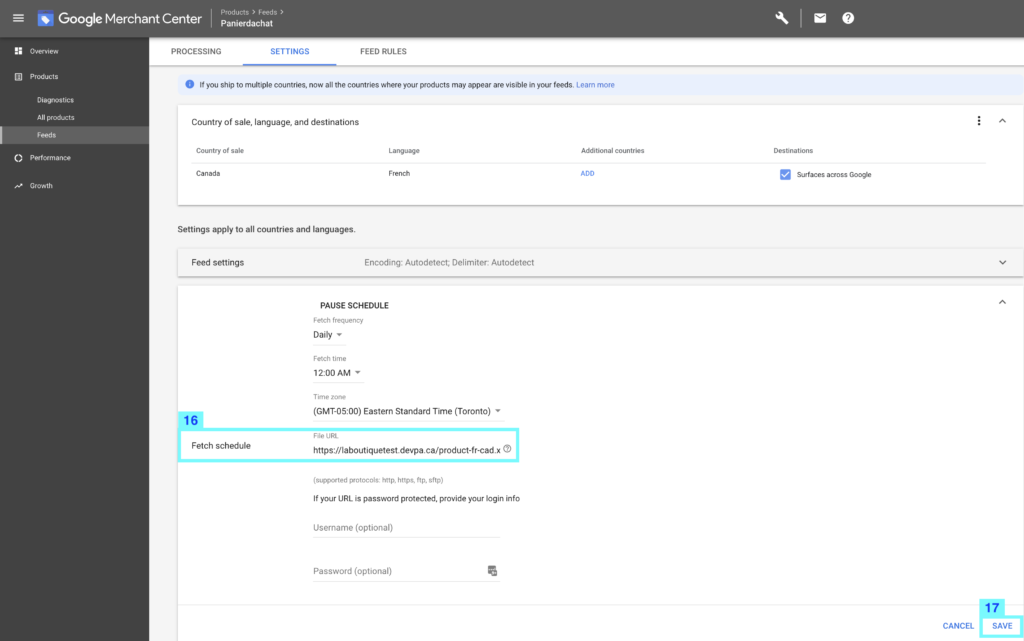
Copy the XML feed url again (16) and click Save (17).
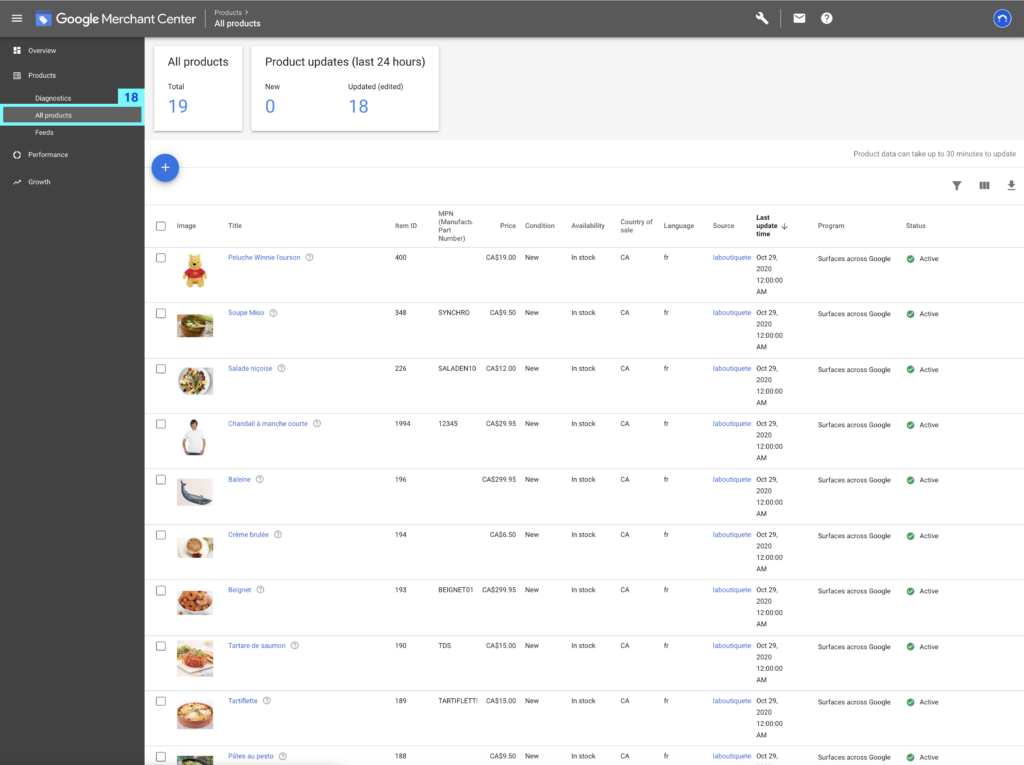
You will find all your products in the All Products section (18).