

How to change the link of an image to make it linkable
Want to add a clickable button to a page or product description?
Here’s how.
First of all, you must have an image. In our example we will take a picture “button” to encourage to click on it.
For this, you can make a picture “button” with software like Gimp, Paint, Photoshop … a simple square with a writing is the case. Or, upload an image to Google Images (attention to rights) by typing “button” and the word you want listed on it (“click here”, “apply”, “submit” …). You can find icons here too.
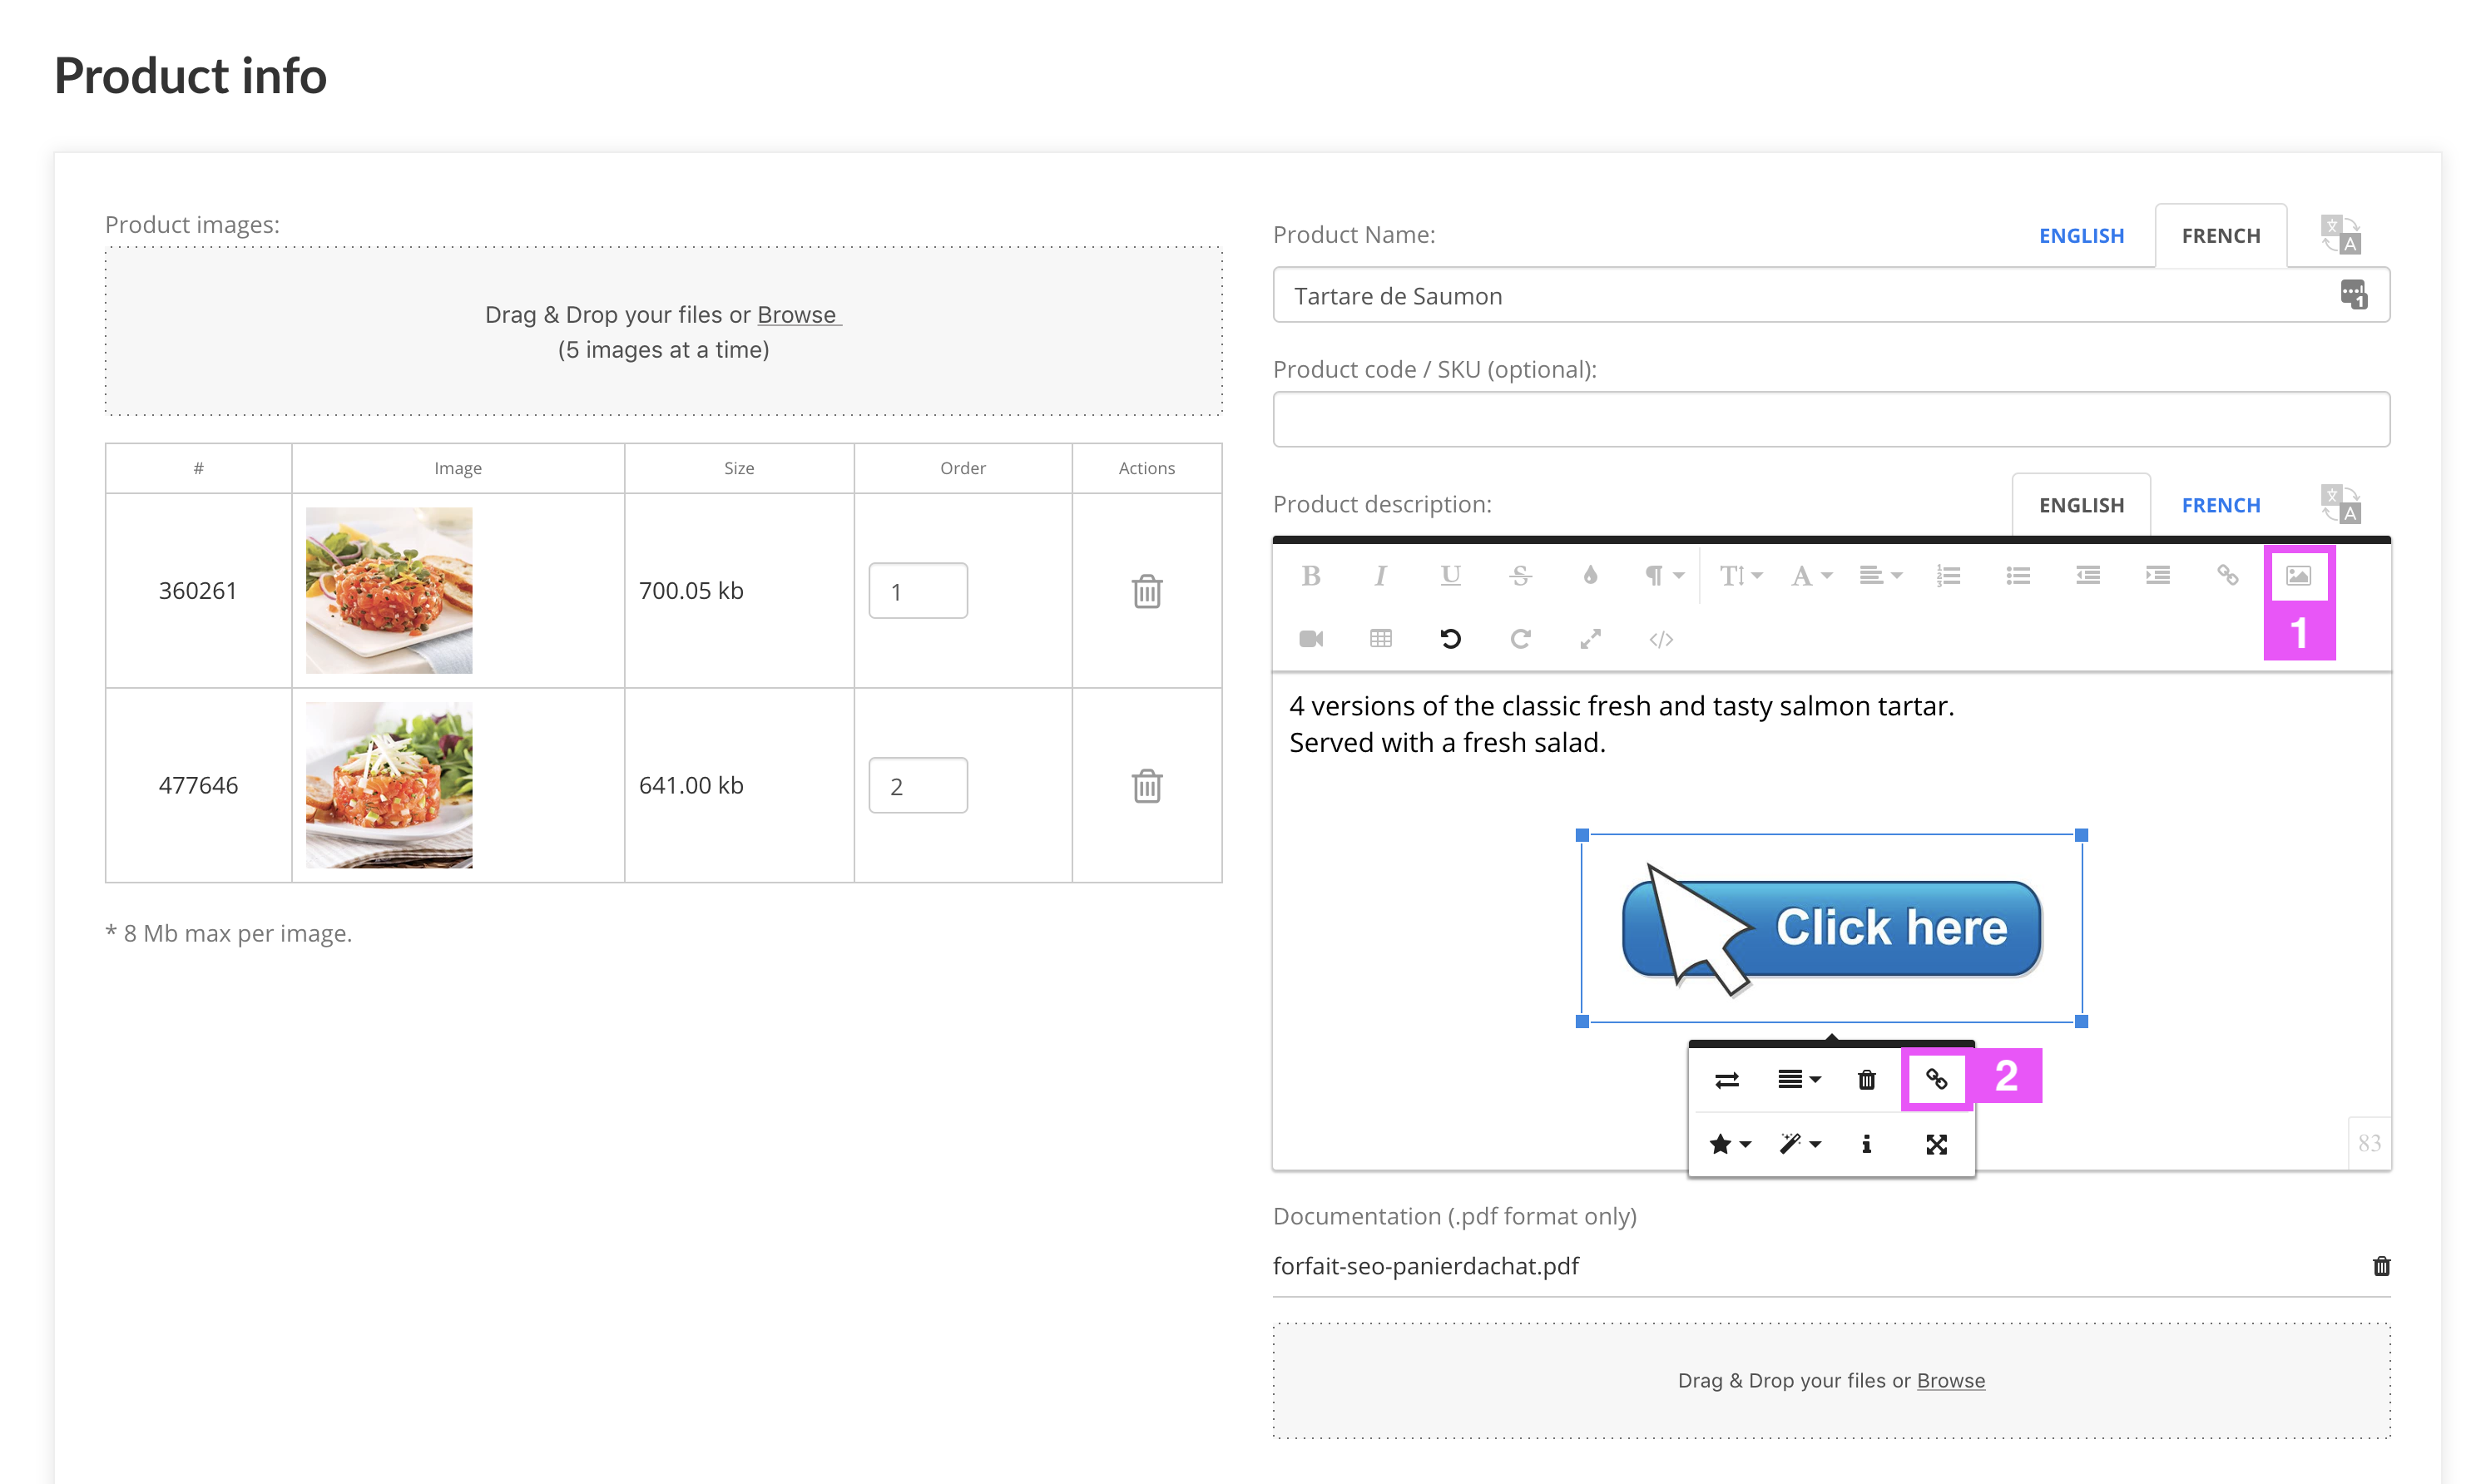
In our example we took a simple “button” image “Click here” to add in a product description.
In the product page, in the description field, add your image (1) below your image will appear a box (if it does not appear just click on the image), then click on the chain link (2).
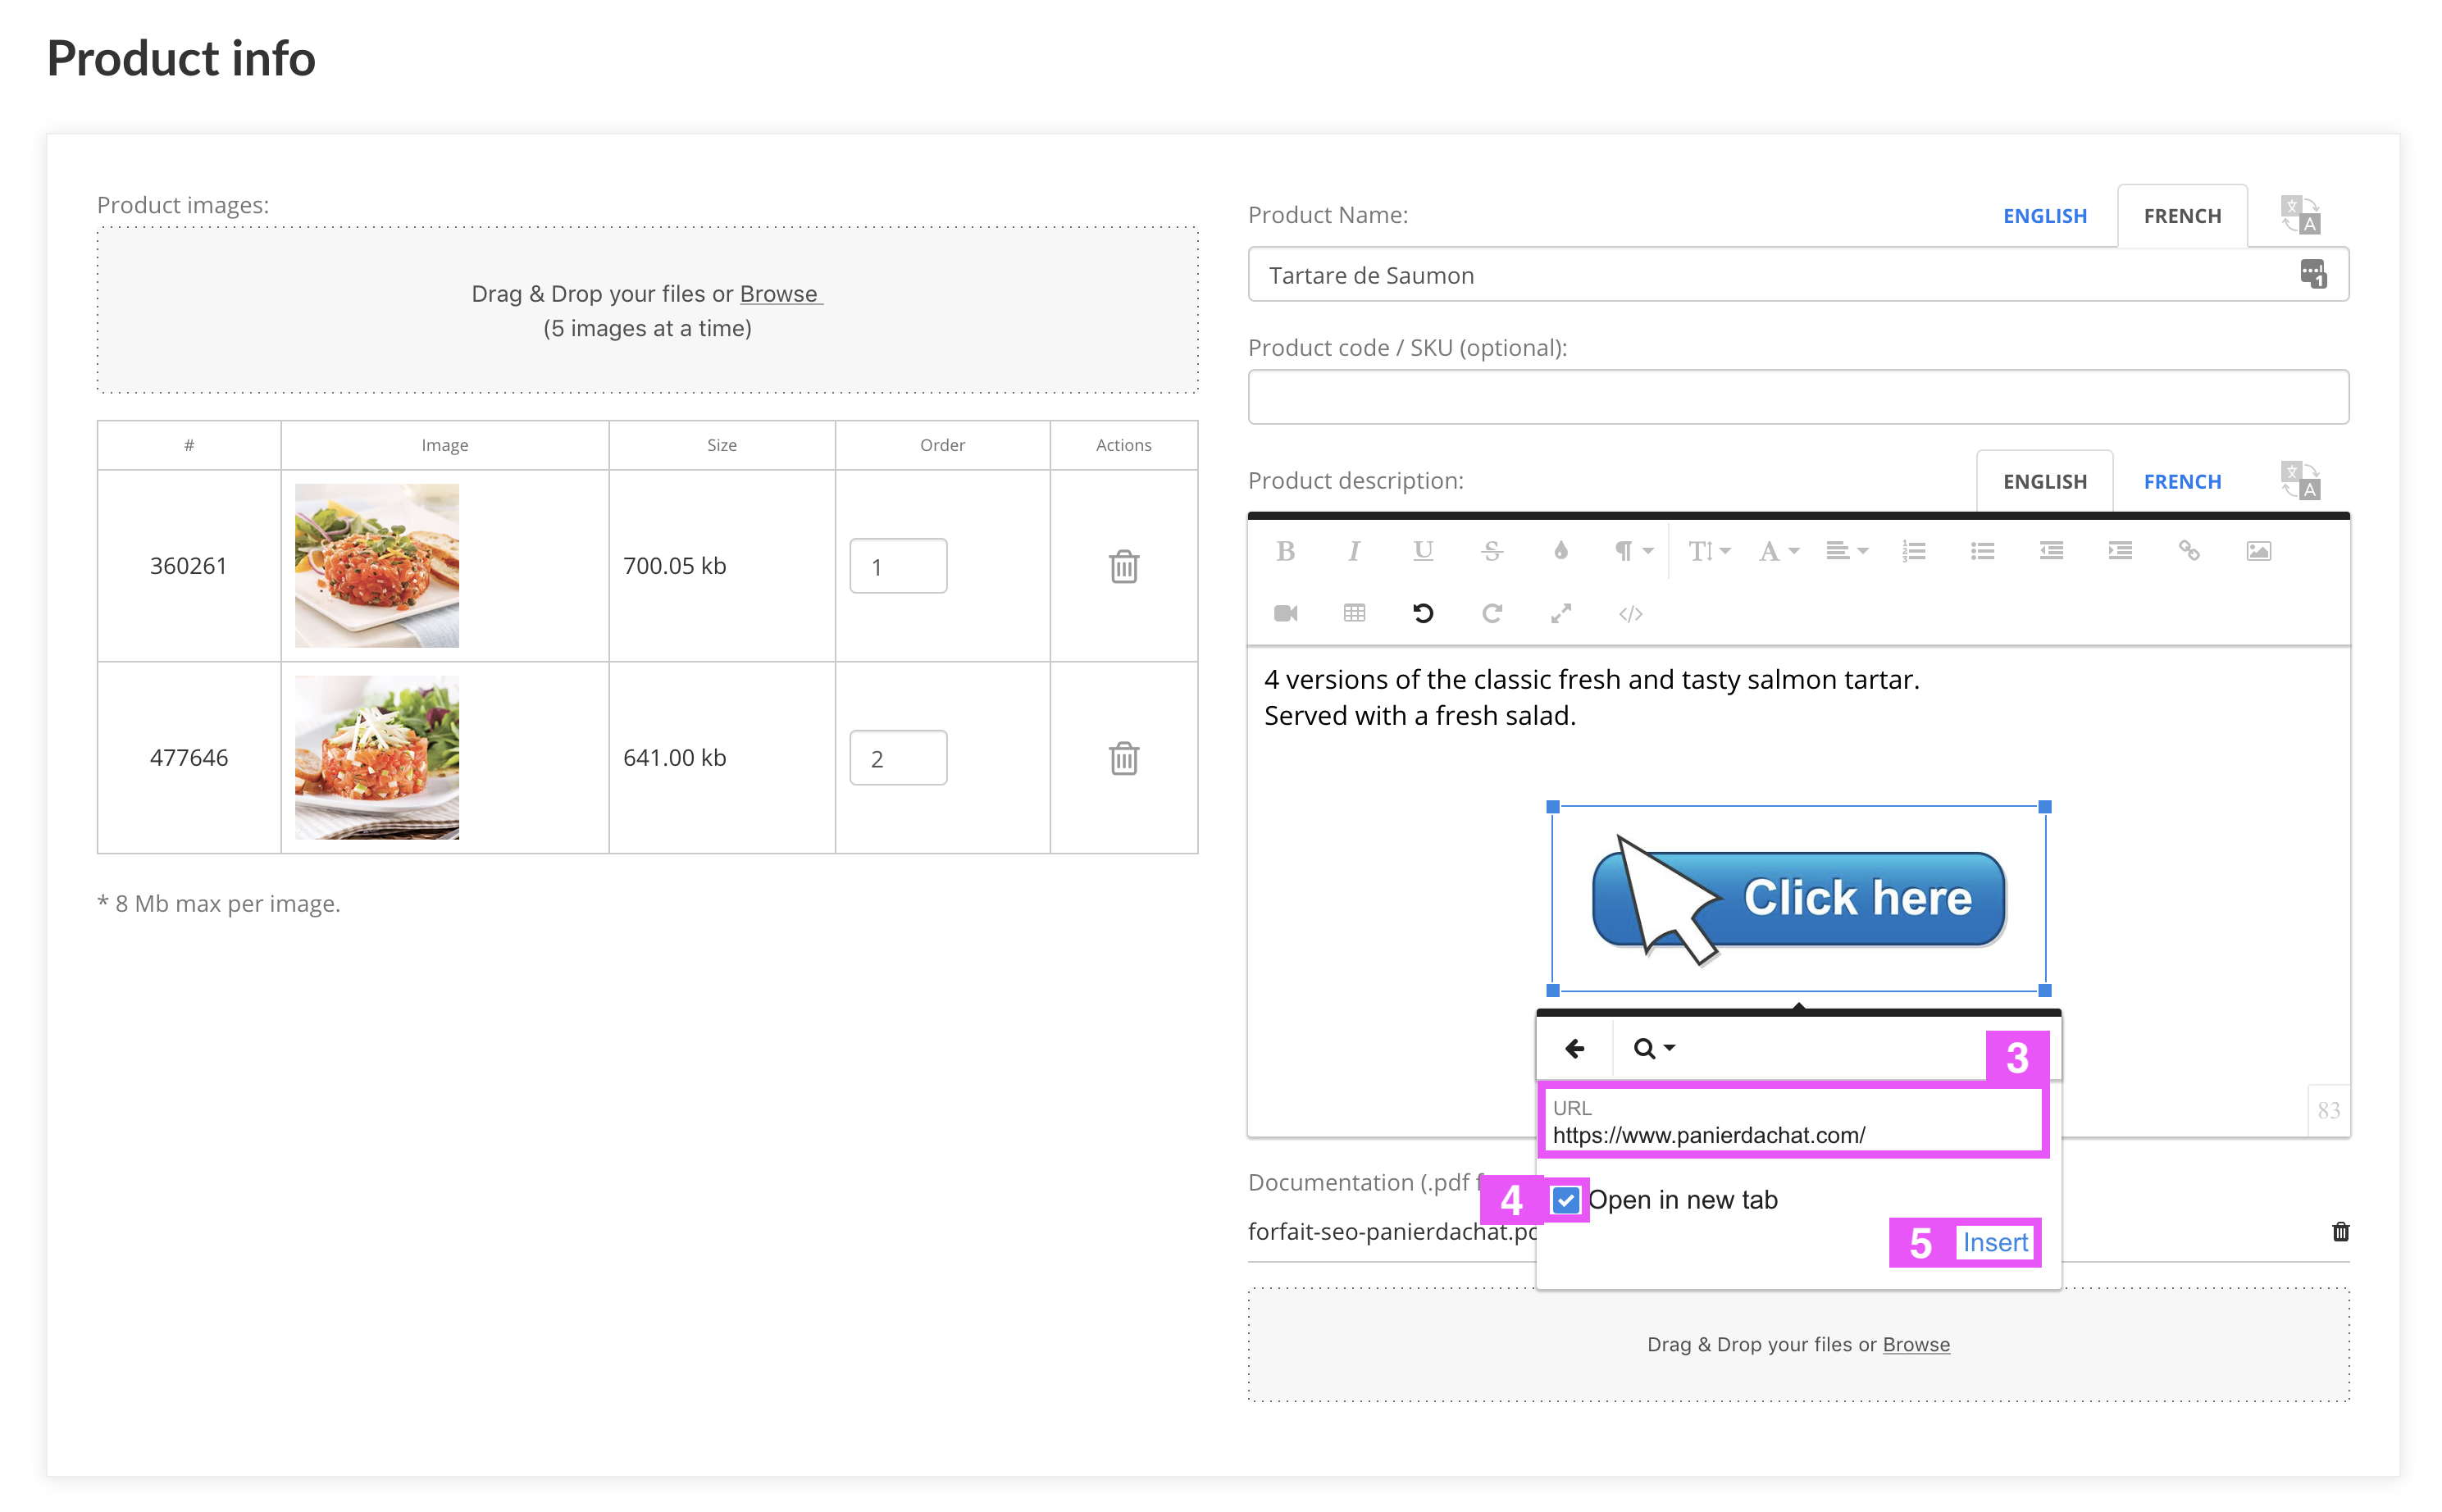
In the URL (3) field, paste the link to which you want to take your visitors.
If this link takes you outside of your shop, we advise you to check the box (4) “Open in new tab” in order to keep an active tab of your shop in your visitor’s browser (and therefore that does not close completely the connection to your shop).
Once done, click on the “Insert” button (5) and save your product.
Go test your button on your online store 🙂
Namely, in the box of step (2), you can manage your image, align it to the left, to the right or center it and many other things, and with the blue corner of the image you can you have fun decreasing or enlarging your image, we let you test and discover 🙂
Bonus
In order to add a link that opens a new mail window with a pre-registered recipient address, you must enter a “mailto” url.
e.g. To send an email to our customer service here is the information to enter: mailto:[email protected]