

How to create a B2B groupe on my online store?
With this help article, we will see how to create VIP / B2B groups and add members to benefit from several benefits dedicated to them:
- Receive discounts by% or $ per product category
- Do not charge taxes
- Enjoy free shipping
- Take advantage of payment by check or cash (offline) to them
How to create a B2B / VIP group?
In your merchant interface, click Management (1) then VIP (2).
In the new page, you will have to give a name to your first VIP / B2B group. To do this enter a name in the field (3) and click Add.
The configuration of your group is added below. You can choose not to apply taxes to future members of this group by checking box (4) or offering them delivery (5). If you check at least one of these two boxes, remember to save (6).
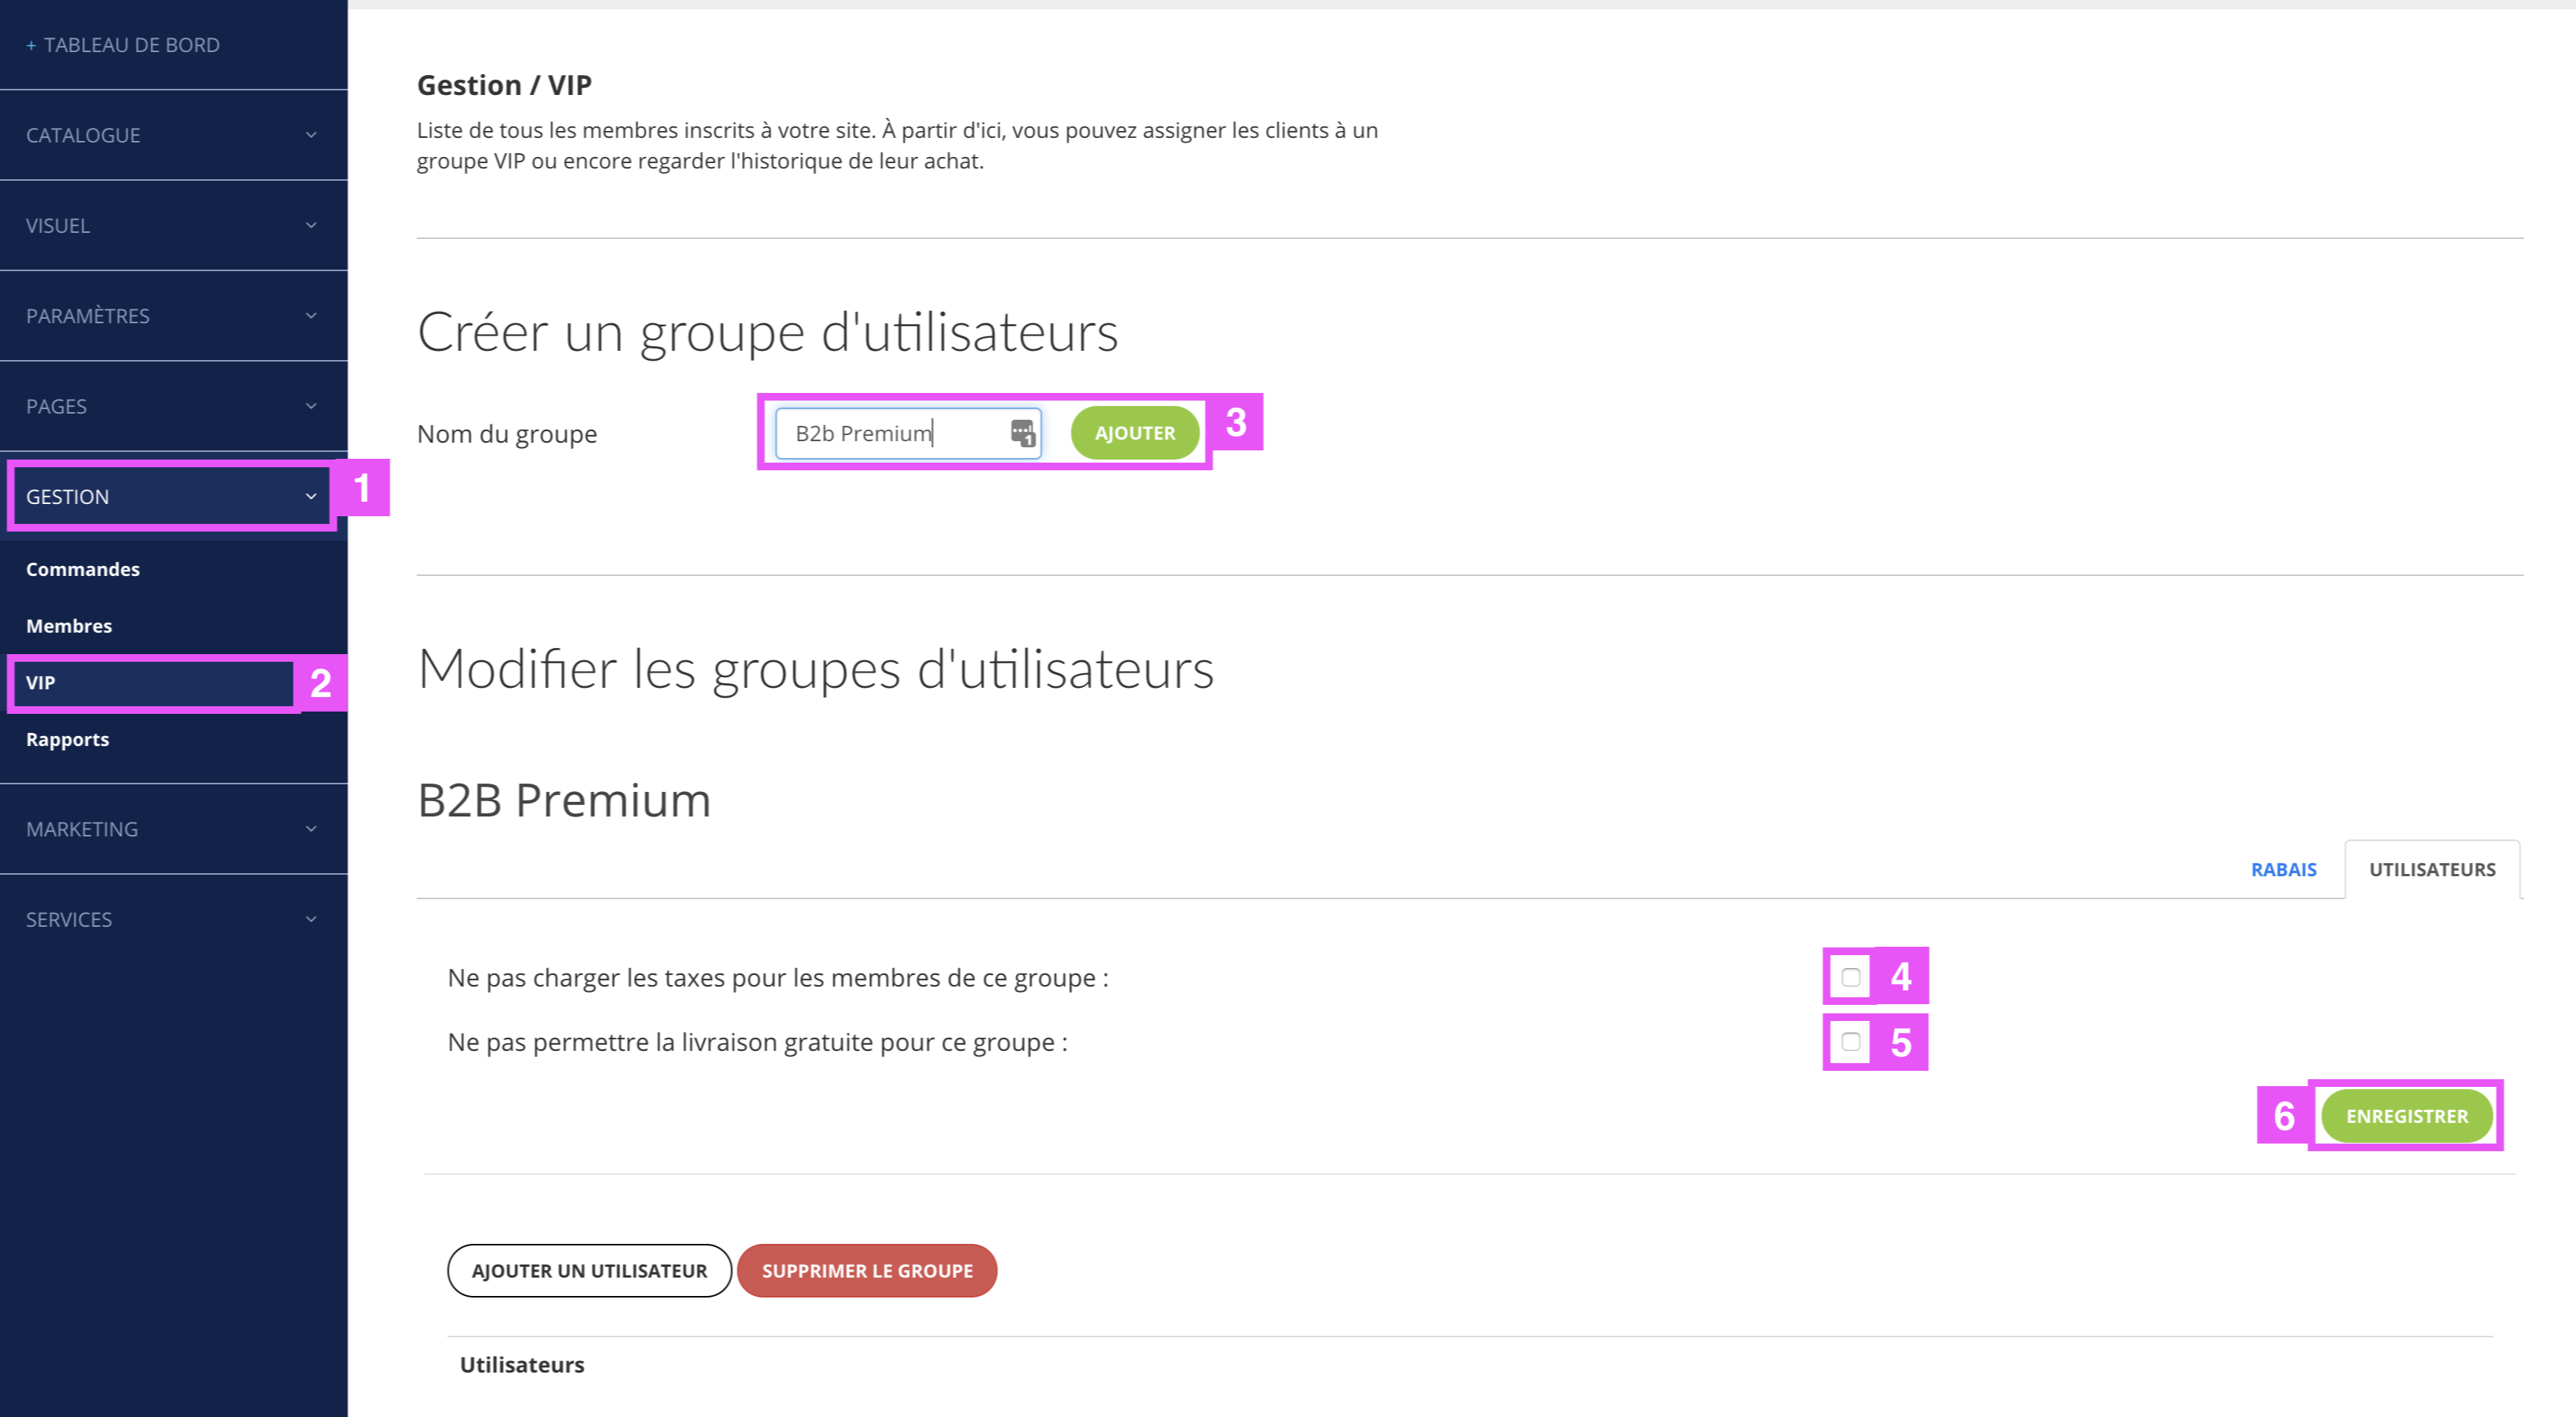
Then configure the discounts applicable to this group by clicking on the Discount tab (7).
In this new page, you can apply a% discount to the entire store (A). Or apply different discounts by categories or subcategories. To do this, choose the Fixed discount type in $ (B) or Variable in % (C) and enter the value in the middle column.
Once the configuration is done, remember to save (8).

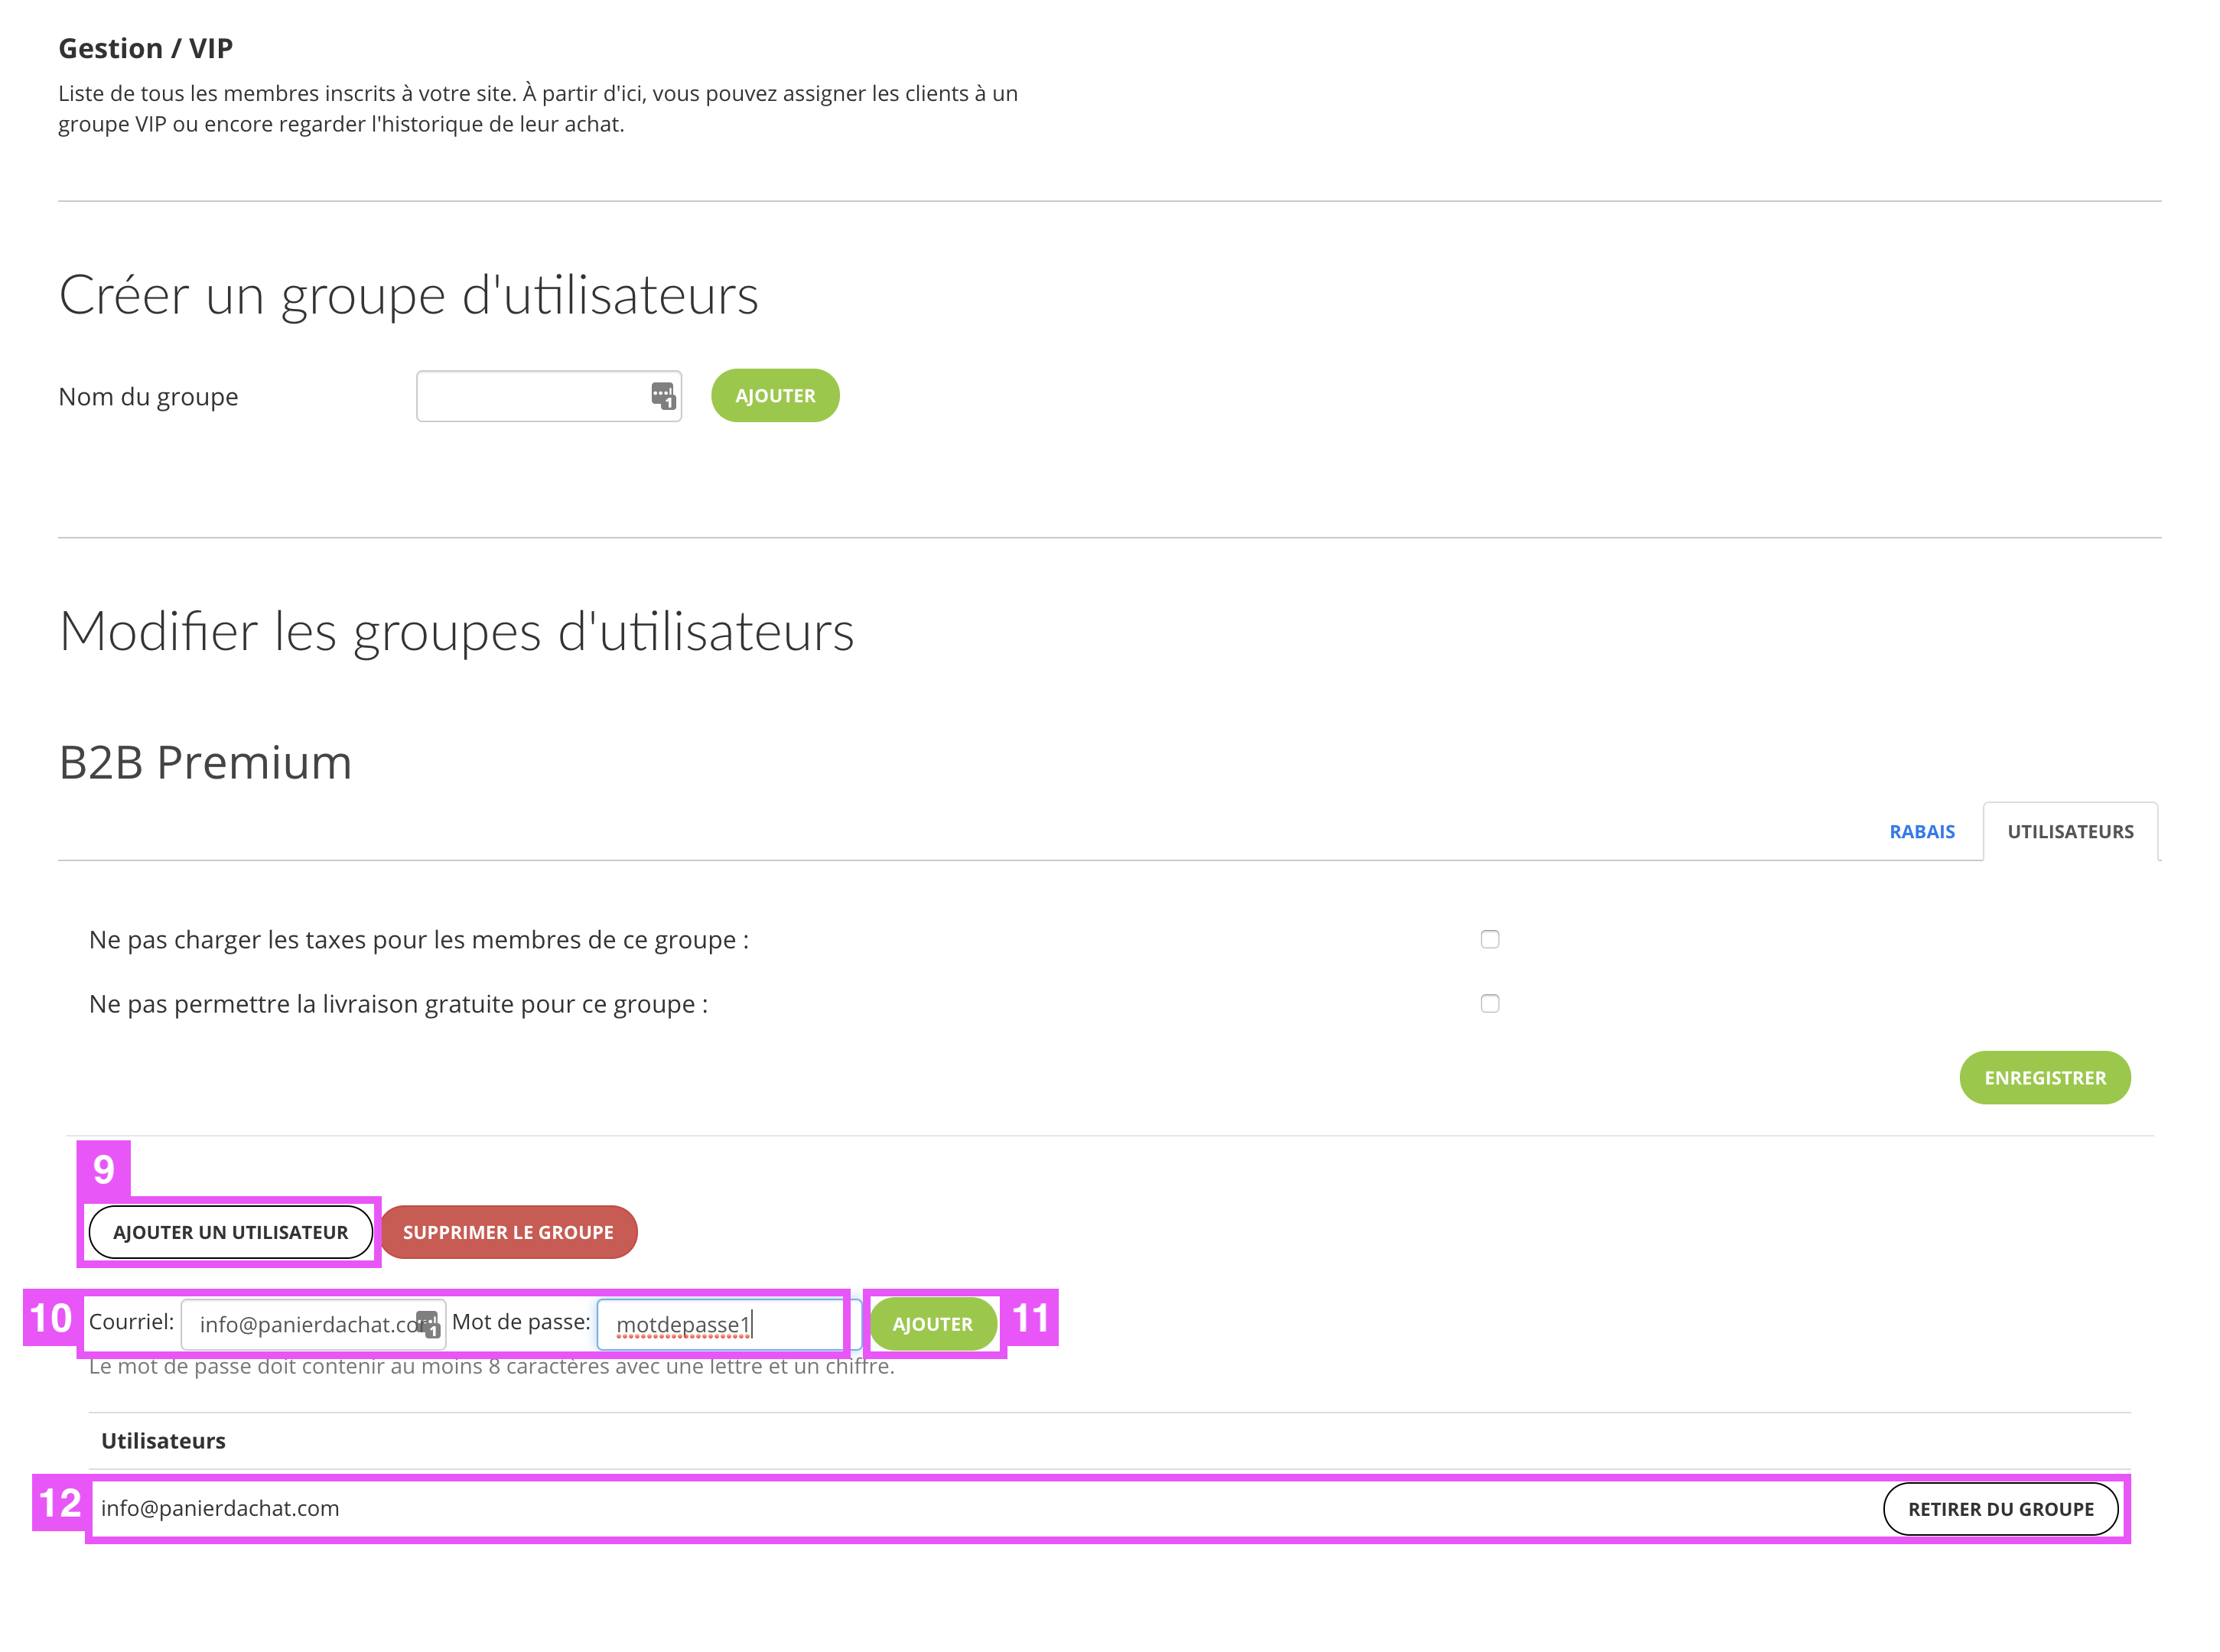
Return to the group configuration by clicking on the “Users” tab to the right of “Discount”.
To add, you have two solutions, the first is in the group configuration and allows to create the user account for your customers.
(The 2nd (explained below) allows you to assign a member account already created to this VIP group).
Click on the button Add a user (9) then in the field (10) enter the email and the password for this member (he can change it after his first login) – You need to enter a password of 8 characters with at least 1 letter and 1 number.
Once this is done click Add (11), the member of this group is then added below (12). You will be able to see the list of all the members of the group here and to withdraw with the button “To withdraw from the group” if you wish it.
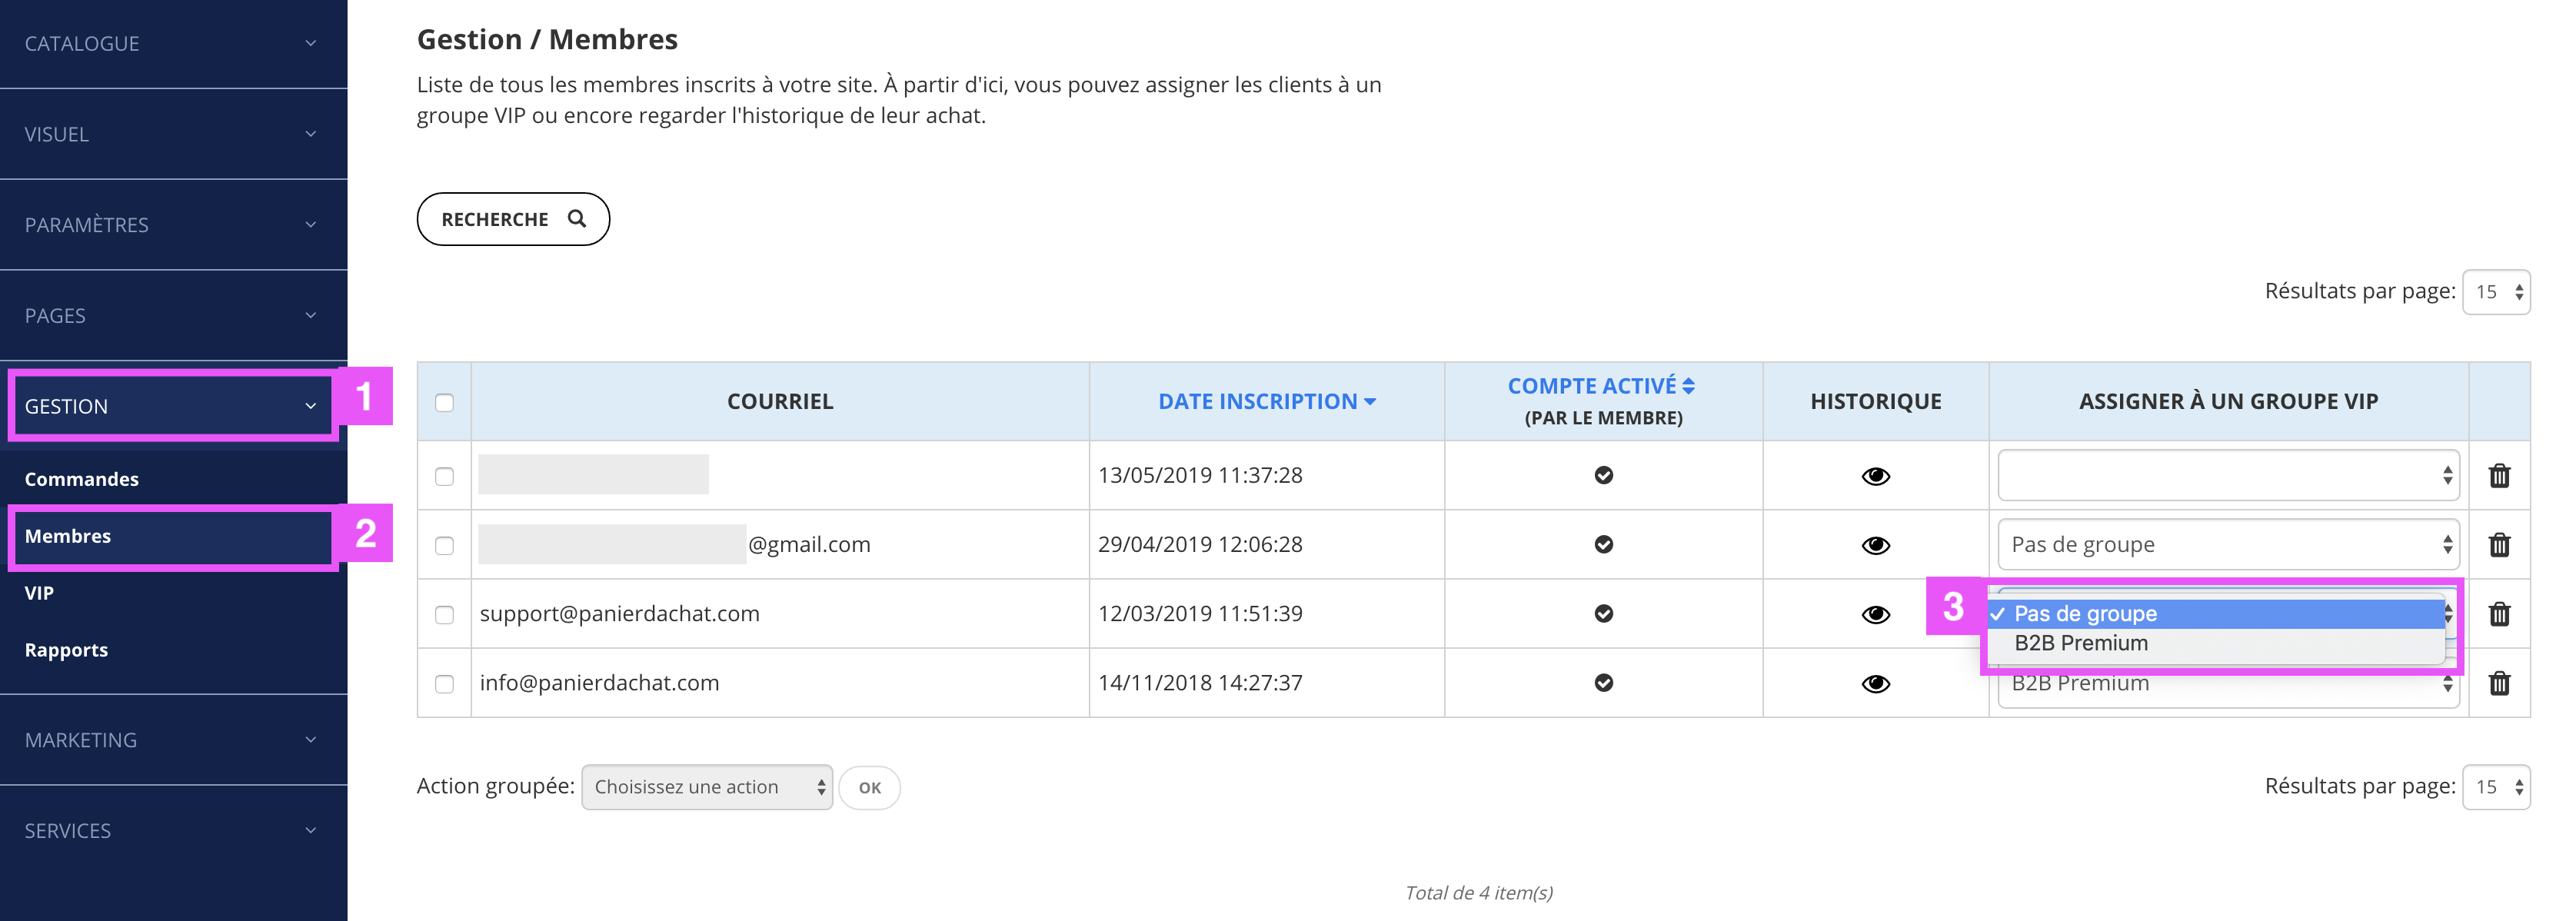
The second solution is in Management (1) then Members (2).
Here the table presents the list of your registered members in your shop. The penultimate column on the right informs you if members are assigned to VIP groups or not. If you want to assign a member to a VIP group, click on the drop-down list in their row and choose group (3).
The recording is done directly by clicking on a group.
Tip:
If you want to apply a discount to a particular product. Add this product in addition to its basic category to an additional category to assign a discount to this category which will have only one product.